Pair Programming has been around for a while. The rise of remote working across the globe made this concept even more interesting for developers as it allows them to code concurrently, no matter where they are. Yet still, many think it is as simple as “two people coding using a single computer.” However, it’s not as simple as that, and the benefits are also not immediately apparent. It delivers more advantages in the medium- and long-term. For instance, pair programming is essential for cooperative teamwork and developing high-quality software products.
Pair programming is an Agile methodology in which two or more developers work together on the same task at one workstation. Pair programming needs at least two developers, and we can see two roles there: driver and navigator. The driver is the person who does the coding and implementation. The navigator is the person who looks for syntax errors, mistakes, and typos by reviewing each line of code when the driver is typing.
Developers continue the work by switching roles frequently. Pair programming is a productive and efficient way to develop software where developers can transfer their knowledge and experience with each other. Leading companies use this approach to improve their productivity and code quality.
Source: reddit
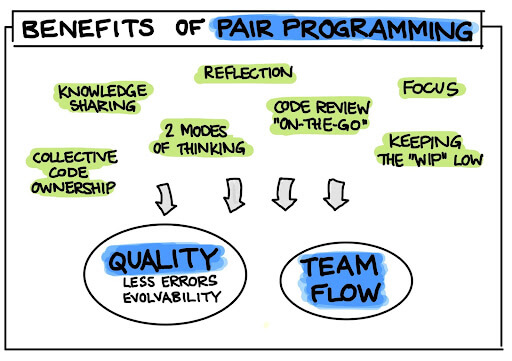
Pair programming can have significant impacts on software development. There are several strong reasons why you should consider this methodology.
Each developer has their strengths and weaknesses. Suppose one is a newly joined engineer who is an expert in some coding stack such as MERN with an experience of more than three years. Another developer is an engineer who works at the organization having three years of experience in the product domain. He knows the executing code, services, database table structures, debugging process, and main workflows.
They can get instant feedback and suggestions, share knowledge about the software product, and share programming skills with their peers by working together on their code. In that case, pair programming will be an excellent way for them to fill some potential knowledge gaps and learn directly from each other. Sharing knowledge also facilitates mentoring, especially when one of the developers is more experienced.
Programmers make common mistakes while coding, such as implementing dead codes, inefficient code blocks, bugs, vulnerabilities, syntax errors, and typos. Yet, in pair programming, another developer is looking at you and sharing his knowledge on best coding practices, so the code is likely to have fewer bugs and mistakes.
The most important benefit gained by pair programming is enhanced productivity. If a single programmer implements a solution, they can sometimes struggle with the code, so it may take longer than the estimated time. Hence it is more productive to use two developers as one can monitor the other and help him in struggling areas.
Moreover, developers can identify potential bugs and performance issues in the early stages. Because solutions are evaluated before implementation rather than after they’ve already been implemented and deployed, developers avoid wasting time changing code at the last minute.
Pair programming enables you to learn from your colleagues and share experiences. Pairing more senior developers with junior developers can also help them integrate better with the team. The time spent working together on the same project will strengthen their relationships, and a united and motivated team is always key to success.
Source: MartinFowler
Microsoft Visual Studio Code is the most popular IDE these days, and there are various tools developers can use on VS Code to perform Pair Programming.
One developer opens up the code and shares the screen with another using a remote sharing tool such as Teamviewer, GitDuck, Anydesk, Codenvy, and Microsoft Teams. Developers can then request access to use the desktops of other developers and write code.
Remote sharing tools are easy to set up. However, there are cons to bear in mind. Because both developers can’t develop simultaneously using the same desktop, one has to wait until the other completes his task. Collaboration isn’t as seamless and practical as developers would want. Plus, it may take them longer to code and they have to continuously wait on one another.
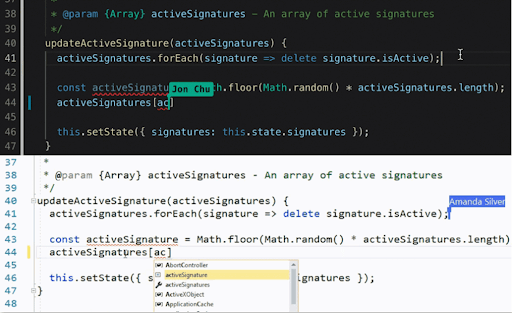
Visual Studio Live Share is another tool you can use to perform pair programming without cloning or installing dependencies on your code. Here, you create a collaborative session and share it with your partner. Your partner joins with the provided invitation link and sees your workspace in their code editor. Then your partner gets access to your codebase. He can navigate and edit code or perform any changes in the codebase. You can see your partner’s cursor and what he is typing when you edit the same file.
Source: VisualStudioLiveShare
You need to download the Live Share Extension Pack from VS code Extension marketplace to Integrate Live Share with Visual Studio code. After that, you need to sign in. There are two Sign-in options: log in with a Microsoft or GitHub account. Click the Sign In button in the bottom status bar with the person icon to log in. After signing in, you can create a session to share with others. Start by clicking your username in the bottom status bar and choosing Start Collaboration Session from the available options.
You can also open the Command Palette (CTRL+SHIFT+P on Windows, CMD+SHIFT+P on Mac) and type Start the Collaboration Session. Then you will get a notification that your invitation link has been copied to the clipboard. You have to share this link with your partners and invite them to your session. Click your username in the bottom status bar and choose Join Collaboration Session from the joining perspective to accept an invite. Enter the collaborative session link sent to you by the inviter when prompted.
This method has certain limitations: VS code Live Share is locked to 5 concurrent users, and it can only be used if both developers use the same text editor.
Apart from the two platforms mentioned above, there are tools built specifically for Pair Programming that developers may want to consider. Pair programming tools offer many advantages:
However, there are some cons too:
You can solve these problems using AI-assisted programming tools. Let’s check how to do it using Tabnine in the next section.
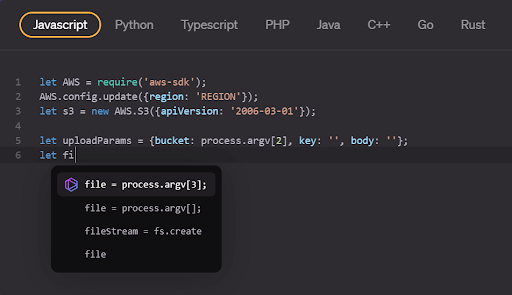
Another way to perform pair programming is to use AI-assisted programming tools. AI-based tools help speed up the software development while ensuring code accuracy. Tabnine is a fantastic auto-completion tool that can deliver significant value to developers. It’s a free plugin that indexes your code and discovers statistical patterns to create customized indications/suggestions based on how you write your code on IDE.
Source: Tabnine
You can easily download it in the VS code marketplace by searching “Tabnine AI Autocomplete.” Apart from that, Tabnine offers you the following advantages:
The goal of any developer is to code faster and with as few mistakes as possible, which will result in a higher quality product in the end. Regardless of their chosen tool, both Pair Programming and AI-assisted programming can support developers and enable them to be more productive.
Digitalization is at the forefront of every industry. As more innovative companies compete to produce best-in-class products and services, speeding up processes becomes necessary to keep ahead of the market. Manually writing every line of code is not only an avoidably complex chore but also a time-wasting one.
Thankfully, long gone are the days when developers needed to write every single line of code manually, all thanks to automation. Auto-completion tools are vital for faster, easier, and more accurate coding, and there are various plugins available for any text editor. This tutorial will teach you how to use the Vim Code Completion tool for any language.
Vi is the first built text editor for the Unix environment. It is an improved version of Vi editor and the name Vim stands for **V** **im**proved. Vim is a free, open-source, and cross-platform text editor available for all operating systems, released to the public in 1991. It is designed for use both from the command line and GUI.
VIM is available under the Vim license, which is compatible with the GNU General Public License through a particular clause that allows the distribution of modified copies under the GNU GPL version 2.0 or later.
Vim supports multiple text editing functionalities by default. Some popular features include *Text auto-completion*, *Syntax highlighting*, and *Text editing using commands*. Vim also supports multiple file formats and programming languages such as Javascript, HTML, and Python. Hence, developers can use the Vim editor to write programs in different files such as `.js` and `.html` files. When writing programs using the vim editor, the syntax highlighting functionality works out of the box and highlights the keywords based on the selected file type.
There are six main modes in Vim editor, and the other six modes are variants of the main modes. The Vim editor footer shows a label of the current mode you’re on. The main modes are:
It’s essential to remain informed about new technologies and practices to excel in this constantly evolving industry. Learn how you can leverage AI to optimize your software engineering in 2023.
Vim editor supports Autocomplete by default for the standard text files and enables autocomplete for programmatic files by explicit configuration.
First, let’s see how to use the auto-complete functionality in the standard text file.
The default auto-complete functionality completes the words you type by checking the available terms in the buffer. To use this functionality, Type some words in the file. Next, type a few characters of the word you need to write and press `Ctrl + N` to complete the word automatically. If Vim finds only one match, it will automatically complete the term.
If Vim finds more matches with similar text typed, the list of words will appear. You can select the term you prefer, as shown in the screenshot below.
If no similar match is found to complete the word, you’ll see an error “Pattern not Found,” as shown below.
We have seen how to use the auto-complete functionality for the text files. Now, let’s check how to enable and utilize the auto-complete functionality for the specific programming languages.
This section will teach you how to enable auto-complete for the JavaScript file.
JavaScript programs are usually written in the `.js` file.
First, create a .js file using the command below.
“`
$vim sample.js
“`
A js file will be created and opened in a normal mode.
Enter into the vim command mode by pressing the *Esc* key and Enter the below command.
“`
:set omnifunc=javascriptcomplete#CompleteJS
“`
Now press the *Enter* key. Autocomplete is enabled for Javascript.
Note that auto-complete is set only for the current session. If you want to make the auto-complete permanent, you can add this command to your `.vimrc` file.
Now press `i` to enter the *edit* mode and type any JavaScript keyword in the text editor and press *Ctrl + x* followed by *Ctrl + o*. Vim editor will show the possible auto-complete suggestions.
For example, type the keyword `document.` and press *Ctrl + x* followed by *Ctrl + o* to see the auto-complete suggestions as below.
This is how you can enable and use the auto-complete feature of Vim editor to write Javascript programs. Each time you open the Vim editor, it takes some effort to enable the auto-complete functionality. Also, the auto-complete only works for a single language during each session. You’ll learn how to overcome these barriers in the next section.
Vim is also highly customizable and extensible. You can customize the Vim editor by setting the configurations using the `.vimrc` file. You can also include plugins to extend the Vim functionality by using the extensive plugins available in the market.
Multiple plugins are available for enabling auto-complete functionality for all languages at once. While using the advanced plugins, the suggestions are based on context rather than standardized. Let’s discover some of the auto-completion engine plugins available.
YouCompleteme is a fast and comprehensive code completion and refactoring engine available for Vim editor. It has multiple built-in completion engines, and developers can use it for any language without any specific language configuration. You can find the list of engines available in the YouCompleteMe plugin here.
When you use the YouCompleteMe plugin, there are no keys to be pressed to auto-complete the code. The suggestions appear as and when you type something in the editor. You can press *Tab* to accept the suggestion if you think it’s valid.
The auto-complete suggestions are based on the file type you’re working with because of the identifier-based engine available in YouCompleteMe. It collects all the identifiers in the current file you work with and the other files you visit to identify the appropriate suggestions.
YouCompleteMe is a Python-based plugin. Also, YouCompleteMe is supported in the Vim editor available in the latest LTS version of Ubuntu. The latest LTS version is Ubuntu 20.04, which contains `vim-nox` at `v8.1.2269`. This Vim version must have Python version 3.6 runtime installed in your system.
To install the plugin, read the following instructions.
Deoplete.nvim is yet another auto-completion engine available for the neovim and the Vim 8 editor. But neovim is the recommended vim editor for this plugin. You can check this article to understand the difference between neovim and vim editor.
Deoplete.nvim plugin is based on Python3. It provides an asynchronous and extensible completion framework for vim editors. The main advantage of the Deoplete.nvim plugin is that it is highly configurable. Also, you need to install various sources for auto-completion of different programming languages. You can find the list of available sources here.
Since this plugin has more settings and different configurations for each programming language, you should use this plugin ONLY when you want to configure every setting explicitly. Otherwise, it is best to use the YouCompleteMe plugin for auto-completion.
You need the Python3 installed in your system to install and use the Deoplete.nvim plugin. To install the plugin, read the following [instructions.
Note that this plugin is currently in maintenance mode and not developed anymore. Ddc.vim is the next-generation version of the Deoplete.nvim plugin.
*Coc.nvim* is another auto-completion plugin available for Vim editor. This plugin is node.js-based. It is a fast and instant increment completion engine. It uses a `jsonc` as a configuration file similar to VS code, making it a very flexible plugin to configure. With this type of configuration, you make the Vim editor similar to the VS code, acting as a comprehensive IDE for your development activities.
You can use this plugin when you prefer to work with the `nodejs` environment. You need to have nodejs installed in your system to use the Coc.nvim plugin. To install the plugin, read the following instructions.
You’ve learned how to install and use the auto-completion plugin in the Vim editor. Using sophisticated plugins such as YouCompleteMe makes the developer’s work more straightforward, as it predicts the code they need to type. Tabnine is a comprehensive code completion solution that plugs into the engines mentioned in this article. It supports ALL languages on 17 IDEs and can write 30% or even more of the code for you, freeing up your time and ensuring you produce best-in-class software. And the best part is: it is 100% free.
Tabnine for Enterprise provides a secure coding environment that allows teams and organizations to host and train their own AI models. This feature facilitates collaborative autocompletion across IDEs and enhances code security by keeping the codebase and AI model on secure corporate servers. With Tabnine for Enterprise, your development team can enjoy the benefits of powerful AI code assistance, which promotes more productive and error-free coding, all while ensuring the confidentiality and protection of your company’s data.

Why reinvent the CSS wheel when the wheel has already been invented – not once, not twice, but multiple times through frameworks such as bootstrap, Foundation, Tailwind, Bulma, and Semantic UI. But there is one UI framework that stands out among the crowd: Material-UI.
Material-UI is designed for rapid prototyping, increasing overall software development velocity, and creating user interfaces at speed. It helps developers spend more time on the logical layers of their apps rather than wrangling with CSS-related interface elements. The perk of Material-UI is that it is made for React. But what is React, and why is it unique?
React is a JavaScript library for building user interfaces. According to Statista, it is now the most popular front-end development framework, surpassing jQuery, Express, and Angular. React is unique because it lets you create reusable components to make your code easy to read and maintain. When a user interacts with a React component, React updates the component automatically, which makes your app more responsive and fast.
By design, React components are small, independent code pieces defined by their functionality, such as forms, menus, or buttons. A component is a self-contained module that renders some UI. React was created to solve issues faced when building large applications with data that changes over time.
Building large applications is different from traditional “imperative” programming, where you have to write code that explicitly tells the program how to update the UI. React takes a declarative approach because it makes your code more readable and easier to manage.
With React, you just describe how the UI should look at any given point in time, and this library will take care of the rest. React will automatically update the UI when the underlying data changes to reflect the changes, which makes your code more straightforward. So, where does Material-UI comes in?

Material-UI is a UI framework for React that offers a wide variety of ready-made components that can be used in your React project. Developers can use these components with the Material-UI styling library, also available in the React world.
One of the great things about Material-UI is that it offers a wide variety of components that can create almost any type of UI imaginable. For example, you can find essential components like buttons, cards, sliders, and more complex ones like dialogs, grids, and Tooltips.
In addition, Material-UI comes with a built-in theming system that makes it easy to create custom themes for your app. You can also use the Material-UI styled-components library to style your own React components without using Material UI at all.
Material-UI has a lot of interesting features that may be of help when developing websites and apps.
One of the main advantages of Material UI is that it is interoperable with different styling systems. This interoperability means that developers can use the library with varying frameworks of CSS or even with vanilla CSS.
For example, let’s say you are using Material-UI in a Bootstrap CSS framework project. You can use the class Name property to add the Bootstrap classes to the Material-UI components. This will ensure that the styles from Bootstrap are applied to the Material-UI components.
Similarly, you can use the style property to add inline styles to the Material-UI components. This is useful if you want to override the default styles of the components or if you are using a CSS framework that does not include a Material-UI theme.
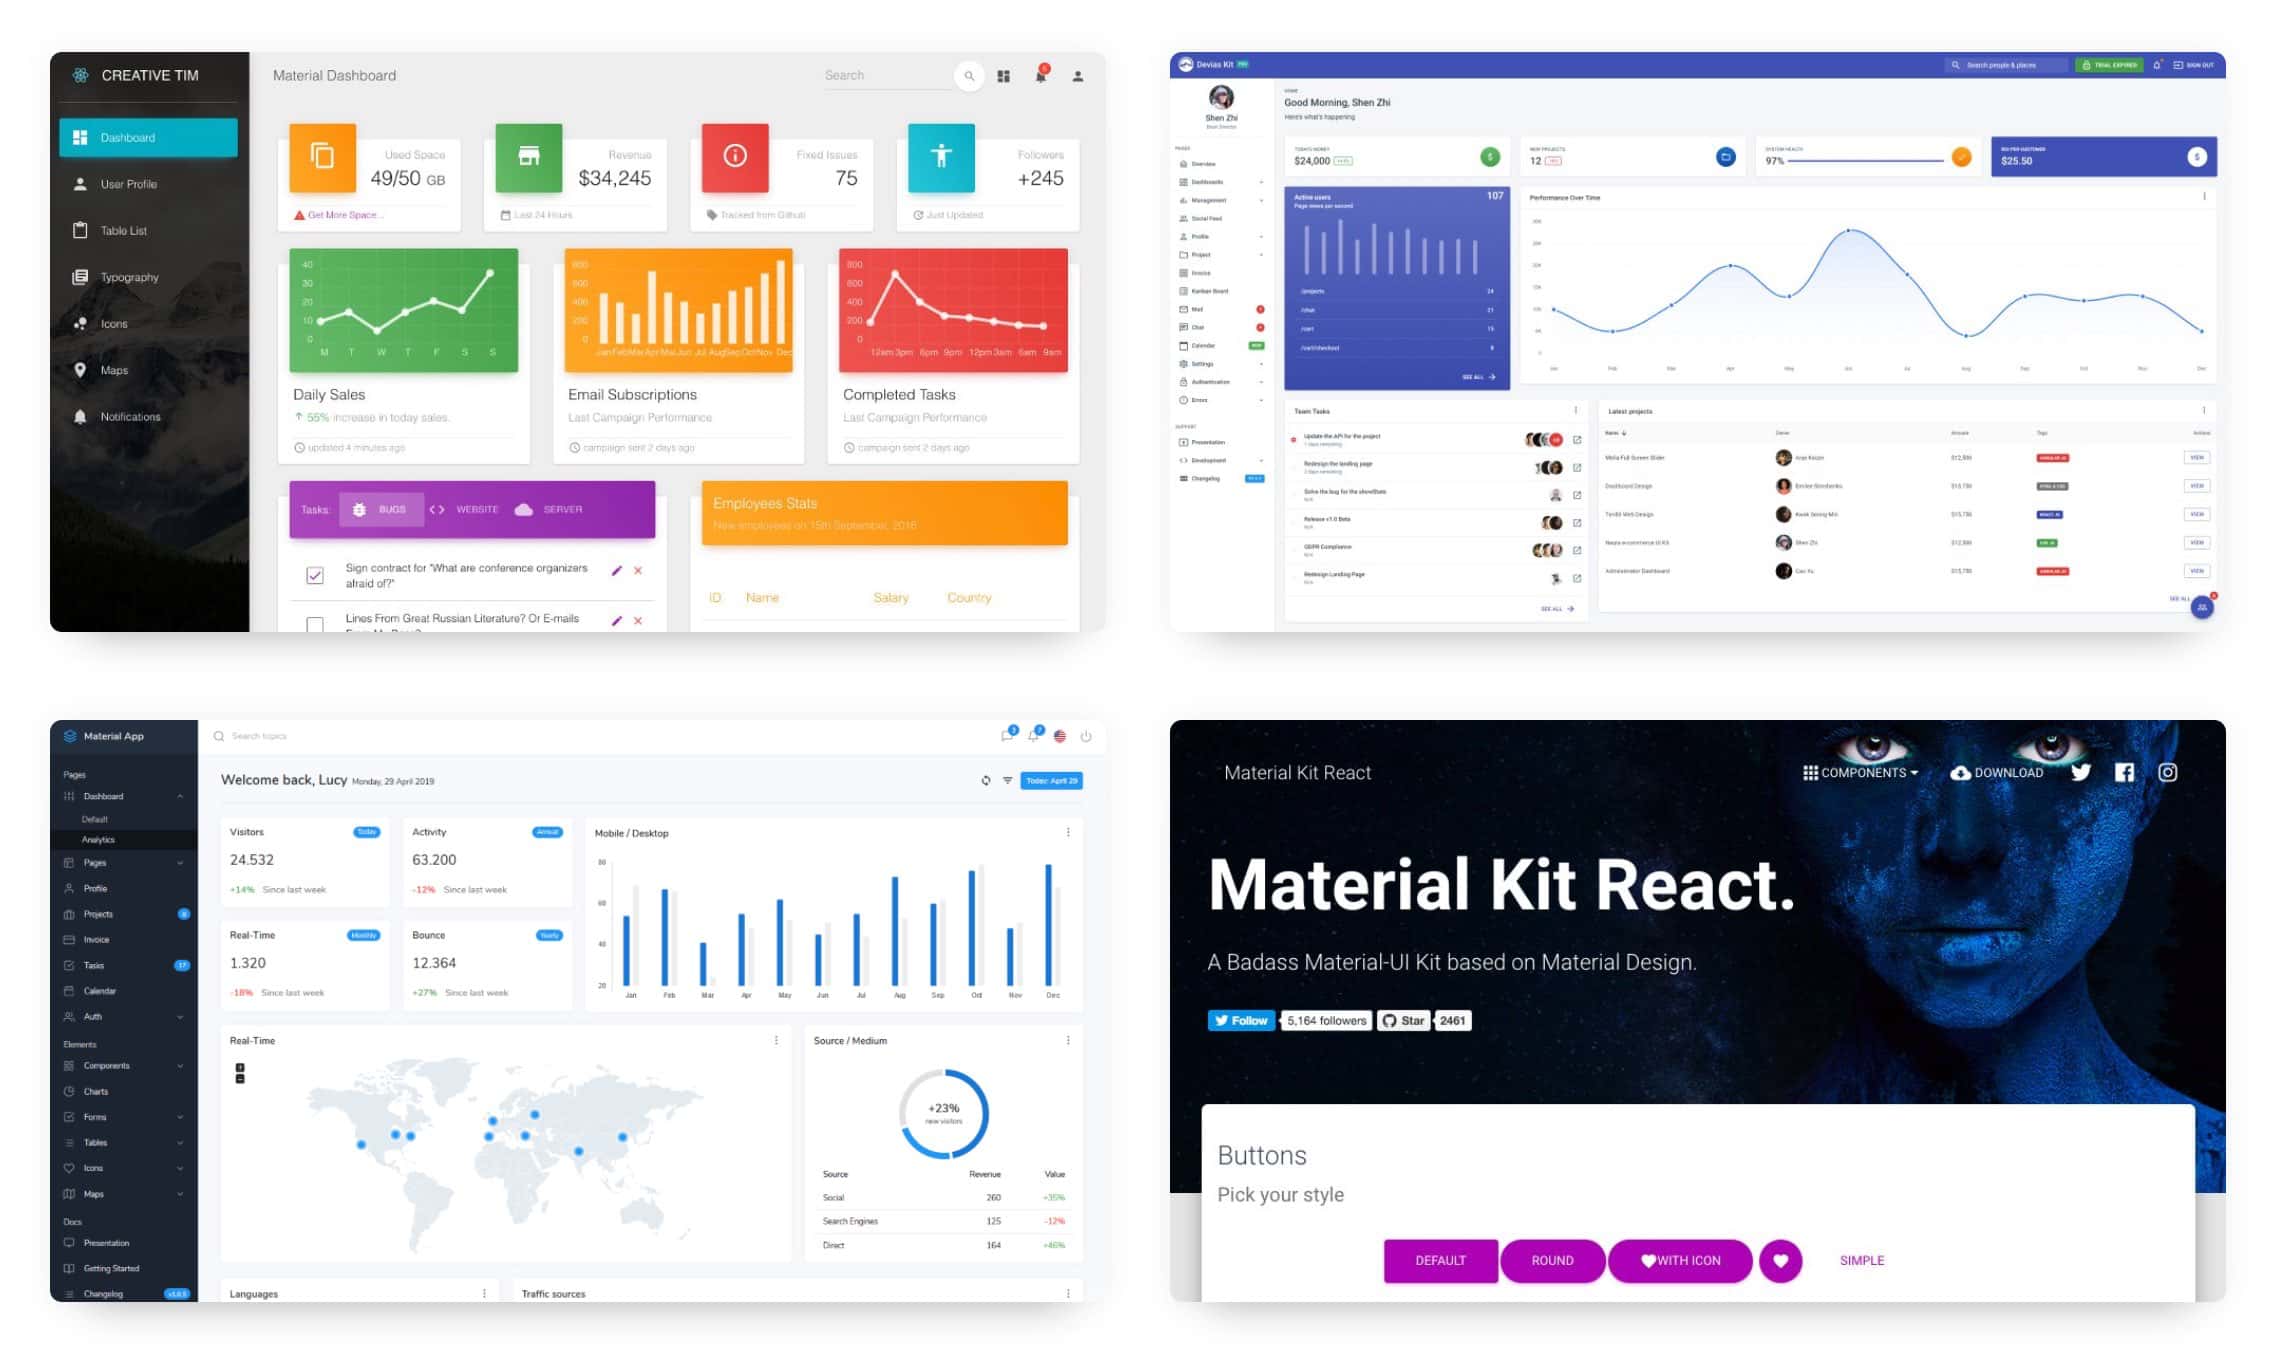
Material-UI offers a set of pre-built components that help you create beautiful websites and apps while saving time and increasing your productivity. All you need to do is choose the right component for your project, and you’re ready to go!
There are a wide variety of Material-UI components available, so you’re sure to find one that fits your needs. Here are a few examples:
Whether you’re building a website or an app, Material-UI has the pre-built components you need to create a beautiful, user-friendly interface.
The ability to easily customize the look and feel of Material-UI is one of its key selling points. The wide range of ready-made themes and component styles means that there’s usually something to suit everyone’s needs, but sometimes you need something a little bit different.
With a few lines of code, it’s possible to create your own theme or even customize individual components to get things looking just the way you want.
Creating a custom theme is straightforward. First, you’ll need to create a file called theme.js in the src directory of your project. In this file, you’ll export an object which contains the overrides for the default Material-UI theme.
import { createMuiTheme } from '@material-ui/core/styles';
export default createMuiTheme({
palette: {
primary: {
main: '#ff4400',
},
secondary: {
main: '#00bbff',
},
},
});
As you can see, we’re importing the createMuiTheme function from @material-ui/core/styles, and we’re using it to create a new theme object. We can then override the palette property to change the colors used.
Once you’ve exported your theme object, you can import it into your application and use it by wrapping your root component in a ThemeProvider component, like this:
import React from 'react';
import { ThemeProvider } from '@material-ui/styles';
import theme from './theme';
function App() {
return (
<ThemeProvider theme={theme}>
<div>
{/* your application code here */}
</div>
</ThemeProvider>
);
}
That’s all there is to it! Now, all of your components will use the colors defined in your custom theme.
It’s also possible to customize individual components without having to create a whole new theme. For example, let’s say you want to change the appBar color. You can use the withStyles HOC to do this:
import React from 'react';
import { withStyles } from '@material-ui/styles';
import AppBar from '@material-ui/core/AppBar';
const styles = {
root: {
backgroundColor: '#ff4400',
},
};
function CustomAppBar(props) {
const { classes } = props;
return (
<AppBar className={classes.root}>
{/* your app bar code here */}
</AppBar>
);
}
export default withStyles(styles)(CustomAppBar);
Here, we’re using the withStyles HOC to inject a classes prop into our CustomAppBar component. We can then use the classes object to access the styles we defined earlier.
With ever-growing popularity of Material-UI, its developers release new updates on a regular basis. New features and components are available for developers to use with each release. The library is also updated regularly to prevent and solve any bugs that are discovered.
This means that developers who use Material-UI can always access the latest features and components. They can also rest assured that any bugs that are discovered will be fixed quickly. This makes Material-UI a very reliable option for developing modern applications.
Some of the features in the latest release include: new grid breakpoints, improved typography, increased spacing, and a new color palette. These are just a few of the many new features that developers can take advantage of.
All of these new features and updates make Material-UI an essential tool for developers. With its yearly release schedule, developers can always be sure they are using the latest and greatest version.
Material-UI is a React component library that provides a handful of great user interface elements that can be used in your React projects. While the documentation support level is not perfect, it is definitely improving, and there are a number of ways that you can get help when you need it.
The first place to look for help is the Material-UI website itself. The website has a fairly decent documentation section that can be helpful for getting started with using the library. There is also a community section where you can ask questions and get help from other Material-UI users.
If you need more help than what the website can provide, there are a number of Material-UI-related YouTube channels that can be helpful. React Meteor is a channel that provides video tutorials on using Material-UI, and the React FortAwesome channel also has a few helpful videos on the topic.
Here are some code snippets to help you get started with using Material-UI in your React app.
import React from 'react';
import { SvgIcon } from 'material-ui';
const HomeIcon = (props) => (
<SvgIcon {...props}>
<path d="M10 20v-6h4v6h5v-8h3L12 3 2 12h3v8z" />
</SvgIcon>
);
export default HomeIcon;
Material UI Fonts
import React from 'react';
import PropTypes from 'prop-types';
import { withStyles } from '@material-ui/core/styles';
import Typography from '@material-ui/core/Typography';
const styles = theme => ({
root: {
...theme.mixins.gutters(),
paddingTop: theme.spacing.unit * 2,
paddingBottom: theme.spacing.unit * 2,
},
typography: {
useNextVariants: true,
},
});
function IntegrationReact(props) {
const { classes } = props;
return (
<div className={classes.root}>
<Typography variant="h5" component="h3" align="center">
This is a sheet of paper.
</Typography>
<Typography variant="body2" component="p" align="center">
Paper can be used to build surface or other elements for your application.
</Typography>
</div>
);
}
IntegrationReact.propTypes = {
classes: PropTypes.object.isRequired,
};
export default withStyles(styles)(IntegrationReact);
import TextField from '@material-ui/core/TextField';
function MyComponent() {
return (
<TextField
id="standard-basic"
label="Standard"
margin="normal"
/>
);
}
import React from 'react';
import { makeStyles } from '@material-ui/core/styles';
import Card from '@material-ui/core/Card';
import CardActions from '@material-ui/core/CardActions';
import CardContent from '@material-ui/core/CardContent';
import Button from '@material-ui/core/Button';
import Typography from '@material-ui/core/Typography';
const useStyles = makeStyles({
card: {
minWidth: 275,
},
bullet: {
display: 'inline-block',
margin: '0 2px',
transform: 'scale(0.8)',
},
title: {
fontSize: 14,
},
pos: {
marginBottom: 12,
},
});
export default function SimpleCard() {
const classes = useStyles();
const bull = <span className={classes.bullet}>•</span>;
return (
<Card className={classes.card}>
<CardContent>
<Typography className={classes.title} color="textSecondary" gutterBottom>
Word of the Day
</Typography>
<Typography variant="h5" component="h2">
be{bull}nev{bull}o{bull}lent
</Typography>
<Typography className={classes.pos} color="textSecondary">
adjective
</Typography>
<Typography variant="body2" component="p">
well meaning and kindly.
<br />
{'"a benevolent smile"'}
</Typography>
</CardContent>
<CardActions>
<Button size="small">Learn More</Button>
</CardActions>
</Card>
);
}
import React from 'react';
import { makeStyles } from '@material-ui/core/styles';
const useStyles = makeStyles((theme) => ({
root: {
backgroundColor: theme.palette.background.default,
},
}));
function MyComponent() {
const classes = useStyles();
return <div className={classes.root}>This is my compoent</div>;
}
Material-UI is fantastic for businesses, startups, and app developers that are looking to get up and running as quickly as possible, with the highest level of flexibility and robustness rolled into one simple-to-use framework.
If you’re not already using Tabnine’s AI-driven plugin, you should definitely check it out. This plugin is more than just another autocomplete – it is a machine learning driven AI system that figures out your project’s code patterns and makes helpful suggestions based on best practices. Tabnine can help your team integrate faster, better, and more succinctly, helping you achieve better outputs and efficiently reducing cognitive load so you can focus on constructing the right solution for your app.
“This is really cool! It’s going to help me tremendously.” These are words I often hear from folks using Tabnine for the first time. They were words that I said when I tried it my first time as well. Still, in my heart I’m an engineer. A mathematician by training and a metallurgist, aerodynamicist and structural engineer by hobby. So when a product or a tool claims to help by XX%, be “the best”, wash your dishes and make your teeth whiter, I’m always the one looking for the asterisk after the claim.
And so it goes for software tools as well. There is no doubt that there are tools that help coders be better, faster and more accurate. Some of these are actual tools and some are simply hacks around IDE’s colors and even environments that contribute to better code. But quantitatively measuring productivity in the world of software engineering is actually quite difficult. It’s something of a mythical beast in the industry and there is substantial investment and a fair number of companies that have grown up around software productivity metrics (1, 2, 3). Each of these companies’ tools measure productivity differently, with various levels of statistical measurements and ML built in to the software.
At the heart of these products is the desire to measure a developers time spent in adherence to best practices and code generated to address product issues prioritized by the team. To a certain extent the industry has some basic metrics that are standardizing the way to measure team performance, though this can still have its issues on an individual developer’s contribution. But if we look at software development in terms of inputs and outputs this results in an overly simplified view of productivity. For example, hours worked in front of the IDE and lines of code produced at the back guarantee nothing when it comes to good software. And over reliance on metrics risks falling foul of Goodhart’s law, “When a measure becomes a metric, it ceases to be a good measure.”
When I worked at Google one of the early projects that I enjoyed was working with the Air Force Agency for Modeling and Simulation (AFAMS). A goal of the project was to help modernize pilot training infrastructure be more efficient, flexibly deployable and faster to integrate modern simulation technology. During the project I was able to talk with fighter pilots about the subject of what information they wanted and were capable of digesting in high stress environments. Graphics presented to the pilot had to balance information density with intuition and reaction speed. The cognitive function of the human brain in various states of concentration and its ability to process information and react is something that has also been studied in the Heads Up Display arena (1, 2, 3)
However, no two pilots are the same. One fighter wants different information from another and one software engineer wants different tools than the next. There is a trend in AI pair programming to generate and suggest increasingly large pieces of code, up to and including DeepMind’s AlphaCode that seeks to generate complete code. Is this direction helpful to software engineers? Or we could consider the other extreme. Suggesting a single word for an engineer writing code is probably equally unhelpful. With large chunks the engineer has to stop and “debug” the code before accepting and with small suggestions the engineer is likely annoyed since they already knew what they were going to type next and constant smaller suggestions are simply noise. So there is a balance to be found with AI code tools where the suggestions are meaningful enough to help complete code faster, while not being either too long nor too short. And this will look different to each individual. Our CTO Eran Yahav talked about the nuances in this recent podcast: AI-assisted development is here to stay – Tabnine Blog
So let’s tie fighter pilot cognition together with measuring software performance. If a tool like Tabnine is to be used in a large company across many software engineering teams, the ROI of Tabnine does need to be evaluated. In essence, any CTO is going to ask, “How is Tabnine going to make my engineers more productive?” Giving engineers access to company code best practices as well as shortening code review times would certainly increase productivity metrics by helping generate code with fewer PR issues in the same or less time. And Tabnine can do this in different ways for different engineers. Some junior engineers might appreciate longer code snippets while others like Tabnine’s own Amir Bilu would appreciate shorter suggestions that don’t break the cognitive flow.
Productivity is a complex question in software engineering. AI tools like Tabnine can certainly improve productivity, but how that happens is both very individual and complex. Keeping tabs on current development metrics and then giving Tabnine a try across the same teams would be a great way to truly understand the best way to deploy these new tools. One thing is for certain, AI pair programming tools are here to stay and if used correctly might even make your teeth whiter too!
Being a software developer in 2022 can sometimes seem like an overwhelmingly solitary existence. One of the challenges of a hybrid or remote work environment is that opportunities to learn and be inspired by your teammates can be limited.
On the other hand, 2022 gives us access to near-limitless possibilities when it comes to finding online virtual mentors. There are some truly incredible devs out there doing some really inspiring work.
Taking inspiration from others is a great way to quickly level up your skills. Remember what Jean-Luc Godard said: “It’s not where you take things from, it’s where you take them to.’”
Here is our list of 10 Software Developers You Should be Following in 2022

Like most of our online mentors, Ania now splits her time between software development and online course creation. Ania quit the rat race a few years back to focus on her growing YouTube channel which has already racked up more than 8 million views and 250 thousand subscribers. Ania is all about ‘reaching and teaching’ with the goal of educating students on how to code by building retro games and awesome projects. You can make your Wednesdays even more wonderful by checking out Ania’s weekly video releases on YouTube and FreeCodeCamp.

Lana is a full-time indie game developer currently working on her very own apocalyptic city survival game called STRAIN. You can check out her daily streams on Twitch and tutorials on YouTube. Lana’s light-hearted approach to game development is always fun, refreshing, and informative. Unlike some of the other developers we’ve mentioned in our list, Lana doesn’t just write code, she’s a legit 3D artist creating tons of gorgeous assets for her games. If you’d like to learn more about the world of indie game development, Unity, C#, and Maya 3D, you should definitely give Lana Lux a look.

Mosh Hamedani is a software engineer with over two decades of experience. He’s taught more than 10 million students how to code through his online courses and YouTube channel, where he’s built a massive following of over 2 million subscribers. Mosh believes coding should be fun and accessible to everyone. He started programming at the age of seven on a Commodore 64 and fell in love with it. Outside the software world, he enjoys photography, playing jazz piano, swimming, and Latin dancing.

CJ started coding Coding Garden a couple of years back and has been dropping fresh content several times a week since then. The community is open, interactive, and engaging. Any coder, from beginner to expert, can learn and grow together. Whether it’s a tutorial, Q&A session, algorithmic problem solving, or full application design and build, there’s always something new to learn in the garden. With close to 50 thousand followers on Twitch, 120 thousand on YouTube, and well over 4.5 million views, you’ll be in good company when you roll up your sleeves and dig into Coding Garden’s content.

Shaun is a full-stack web developer and online instructor with more than 1000 free programming tutorials on his YouTube channel The Net Ninja. His massive library covers subjects including – Modern JavaScript, Node.js, React, Vue.js, and Firebase just to name a few. The depth and breadth of his courses have helped him land a loyal following of close to 1 million subscribers. In addition to creating compelling course content, Shaun works on various UK-based eCommerce websites for small independent organizations as well as large international brands.

Ben is an enigma of sorts, his celebrity extends far beyond the boundaries of the development world into the mysterious domain of ‘social influencer heartthrob’. Vox wrote an article about him last year entitled “Anatomy of a TikTok hunk”. At only 24 years old, Ben has already built an enormous following on TikTok and YouTube with videos focusing (mostly) on React, React Native, GraphQL, Typescript, Node.js, PostgreSQL, and Python software development. His YouTube community tops 350 thousand and he’s racked up more than 14 million views on Tik Tok.

Jeff is the founder of fireship.io, home to a massive free and paid tutorial catalog. Delaney has also accumulated over 1.2 million subscribers and 116 million views on the fireship.io YouTube channel. The channel is home to tons of “High-intensity ⚡ code tutorials to help you build & ship your app faster.” Jeff refers to his Fireship.io website as “a gateway drug for developers who want to build awesome web & mobile apps.” One of the massive benefits of the fireship.io business model is that you get to spend hours watching free tutorials before having to decide whether or not Jeff’s teaching style works for you.

Yan, who is a massive fan of graphics rendering, got his start working on game engines for the TripleA industry behemoth Electronic Arts. After putting in a solid 4.5 years at EA, Cherno decided to head out on his own and start Cherno Studio, built using his very own game engine he named Hazel. You can join the close to half a million subscribers who regularly tune in to The Cherno’s YouTube channel for a behind-the-scenes peek at the process and follow the team building the games. The channel is packed with tons of tutorials geared toward programmers interested in game development.

Safak’s YouTube channel is less than 2 years old and has already racked up more than 80 thousand subscribers and 4.5 million views. Safak’s passionate full-stack approach to teaching web development has played a key role in the meteoric rise of his audience numbers. If you’re itching to add some web design and animation skills to your toolset and React, Node.js, HTML, and CSS tutorials are your jam, Lama Dev is definitely worth a look.

Bucky and The New Boston have the oldest and largest YouTube channel on our list by far with 2.6 million subscribers and nearly 500 million views. The TNB channel was started back in early 2008 and is packed with hours of free tutorials. New devs can dive into the well-organized playlists for JavaScript, Java, C, C++, and Docker tutorials. If you’re interested in blockchain tech, you may want to check out TheNewBoston blockchain project, an open-source digital economy being developed by a community of contributors all over the world. This economy rewards contributors in TheNewBostonCoin (TNBC) for adding value.
Are you following some incredible devs that weren’t on our list? Share their names with us @Tabnine_ onTwitter and maybe we can add them to our next list.
In its simplest form, software development is the process of creating software. However, this process isn’t as simple as it sounds. It involves many other phases, including envisioning, designing, testing and deployment.
In recent years, there has been a shift towards more agile methods of software development. These are more collaborative and iterative approaches that allow for more flexibility and faster feedback. The Software Development Life Cycle, or SDLC, serves the purpose of improving visibility and streamlining the entire software development process, enabling developers to perform better and deliver faster.
Having an understanding of the software development life cycle is important – but what exactly is it? Why does SDLC matter? And how can you improve your SDLC?
The software development life cycle (SDLC) is a process that outlines the steps necessary to develop a piece of software. Depending on the size and complexity of the software, the SDLC can be executed in a number of different ways. Typically, the SDLC is executed in a waterfall model where each step flows into the next. However, some organisations are beginning to move towards an agile methodology where steps are executed in a more iterative fashion.
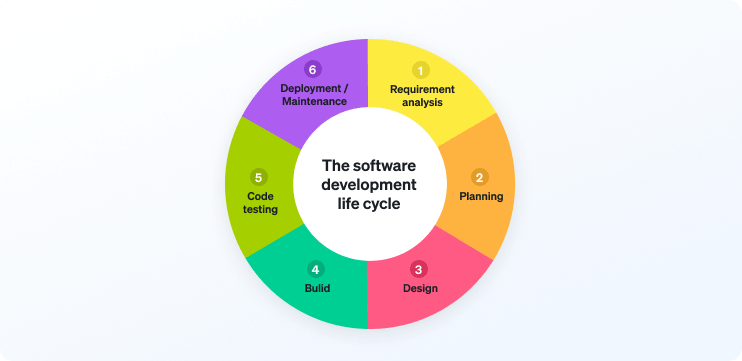
SDLC is typically broken down into the following steps:
Analysis: The first step in the SDLC is to analyse the business requirements for the software. This includes understanding the purpose of the software, the target users, and the expected outcomes.
Design: This includes creating diagrams and models that show how the software will work.
Development: This involves writing the code for the software and testing it to make sure it meets the requirements.
Deployment: This involves installing the software on the appropriate servers and testing it to make sure it is functioning correctly.
Maintenance: This includes fixing any issues that may arise and making updates to the software as needed.
SDLC is a conceptual model that defines the stages and tasks of the software development process. The framework is important because it helps manage complexity and risk, and allows for the orderly delivery of software products. The model consists of a series of interrelated tasks that must be completed in order to produce a working system.
Each phase of SDLC has specific tasks and deliverables that must be completed before the next phase can begin. This ensures that all requirements are met and that the system functions as intended, enabling developers to work more efficiently and avoid overlap in work.
In order for an SDLC to have a clear direction and purpose, it is essential to choose an agile methodology that is appropriate for the project.
Some of the most popular agile methodologies are scrum, kanban, and extreme programming (XP). Here is a quick overview of these different methodologies:
Choosing the most suitable agile methodology enables the SDLC to have a clear purpose and end-goal. It also helps to take into account budgets, capacity, team logistics, and other factors that are important to the success of the project.
Planning is crucial to an efficient SDLC because it helps ensure that the team is working towards common goals and that everyone is aware of what needs to be done. Standards, requirements, and processes help to avoid confusion and ensure that tasks are completed in a logical and coordinated manner.
One of the main benefits of using standards is that they provide a common language for the team. This way, everyone is on the same page and there is no confusion about expectations. Standards can also help to streamline the development process by providing pre-determined templates and guidelines that can be used as a starting point.
Testing is an important process in software development. It enables developers to spot issues earlier on and requires fewer resources than manual testing. Automated testing is a type of software testing that uses software to test other software.
Some benefits of automated testing include:
When you’re working with large amounts of code, trying to manually keep track of where you are and all the possible places you could go next can be extremely difficult and time-consuming. This is where AI tools like Tabnine can make the SDCL easier, faster and more accurate.
Tabnine is a tool that uses artificial intelligence to help you work faster and more accurately with source code. It does this by providing you with a list of possible completions for the code you are typing, as well as showing you the context of each suggestion. This context is very important, as it helps you to understand how the code you are typing fits into the rest of the codebase.
This is especially useful when you are working on a large project with a lot of code. Tabnine can help you to quickly find and fix errors, as well as navigate through the codebase. It can also help you to write code more efficiently, as you can quickly find and insert code snippets into your project.
In agile software development, timely and effective feedback from users is essential to the success of the project. The feedback helps the team to understand user needs and to make necessary changes to the product. In order to ensure that the feedback is timely and effective, it is important to get it frequently, at all stages of the SDLC. This enables the team to minimise the amount of rework needed at a later stage, but also to build a better product.
Many programmers feel that the best way to be productive is to do as many tasks as possible at the same time. However, this can actually lead to inefficiency and lower productivity. Multitasking can lead to task switching, which in turn results in loss of focus and decreased productivity.
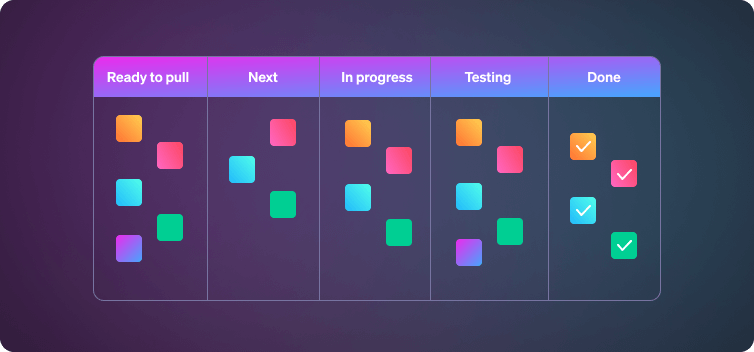
By streamlining their tasks and focusing on one task at a time, programmers can optimise their workflow and ensure higher quality deliveries. In order to define your Work in Progress limit, you need to take into account factors such as team size, customer demands and business capacity. It is important to control and modify your WIP limit as outside factors change.
Developers write software to solve problems. The sooner they can find and fix errors, the sooner the software is ready for its intended purpose. Frequent code reviews and pair programming help developers do just that.
There are several benefits to code reviews. One is that they enable developers to share knowledge. By reviewing someone else’s code, you learn how they solved the problem, what techniques they used, and what constraints they faced. You also learn about the various ways the code could be improved.
SDLC is necessary because it helps developers manage risks, ensures that products are delivered on time and within budget, and improves communication between stakeholders. AI-driven tools like Tabnine can assist in creating accurate code that requires minimal refactoring by detecting and determining patterns and architectural decisions in your code. This means that you can spend more time designing your code rather than writing it.
Once upon a time, programming was a slow and tedious process. You had to write code, compile it, run it, and see if it worked. If it didn’t, you had to go back and rewrite your code, and then repeat the process until you got it right. Fortunately, these days there are a number of ways to speed up the coding process, as well as to ensure accuracy – agile software development is one of them.
But what is Agile? What is its role in software development? And how do you implement it in a programming context?
Agile software development is a project management methodology that allows for changes and adaptations in project plans and goals as the project evolves. It follows the philosophy that the best way to manage a project is to respond to changes as they occur, rather than trying to stick to a rigid plan.
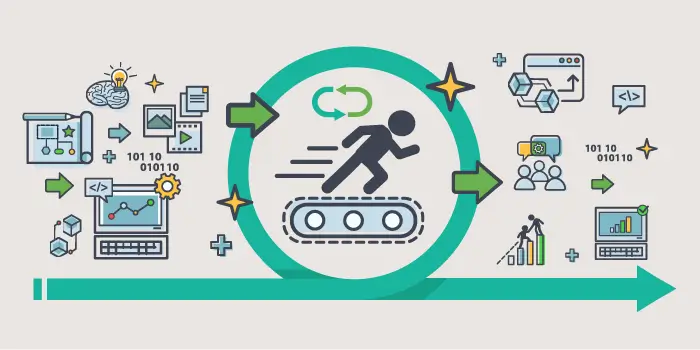
Source: SysAid
This may seem like a chaotic way to manage a project, but agile software development actually relies on a number of principles that ensure that the project stays on track and results in a usable product. These principles include regular feedback, a team-based approach, and continuous delivery of working software.
The goal of agile software development is to produce software that meets the needs of the customer. The customer is involved in the project from the beginning, and the team works closely with them to get feedback and make adjustments as the project progresses. This ensures that the final product is exactly what the customer wants and is able to use.
In agile software development, requirements and solutions evolve through collaboration between self-organising, cross-functional teams. Agile enables swift and flexible responses to change, constant communication and feedback among team members, and early delivery of working software to stakeholders.
Agile practitioners use specific tools and techniques which they call “agile methods” or “methodologies”. Many agile methods are based on Extreme Programming (XP), a software development methodology that relies on customer collaboration, refactoring, and regular releases to improve the quality of software.
There are a variety of agile methods, but most share some common properties:
Testing is an essential part of agile software development. In order to ensure that new features or changes to code do not break the existing system, automated tests are used to verify that everything still works as it should. Automated tests can help to identify issues early in the development process before they become a problem.
There are a variety of software tools that can be used for automated testing. Some of the most popular ones include Selenium, WebDriver, and Cucumber. These tools can be used to automate the testing of web applications, mobile applications, and desktop applications.
Agile software development is an approach to software development that emphasises collaboration, iteration, and customer feedback. One of the tenets of agile development is that the software should be easy to read and understand. This means that the code should be easy to follow and that the intent of the code is clear.
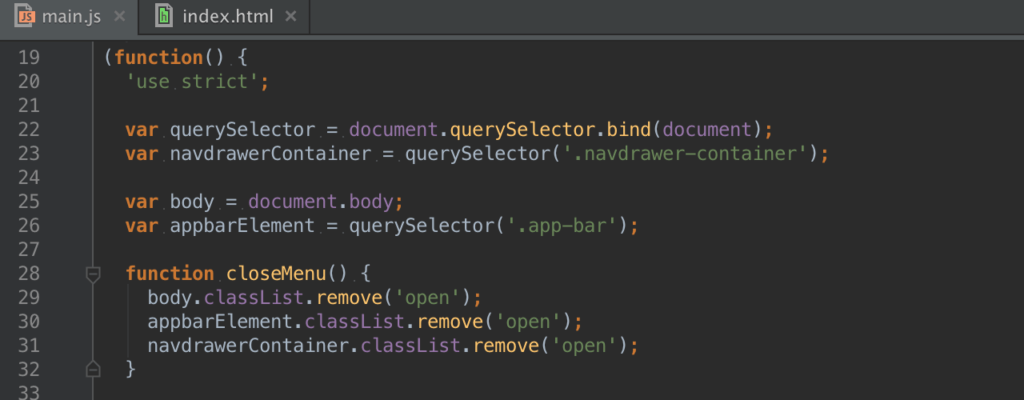
Source: JetBrains Blog
There are many ways in which you can improve the readability of your code. Some of these include adding comments to your code to ensure that other team members are on the same page, keeping your indentation style consistent, and introducing a standardised and consistent naming scheme.
Third-party tools can help developers speed up the code review process by automating many of the tasks that need to be completed. They can also help developers ensure that code is reviewed accurately by providing feedback on coding style, errors, and more.
Tabnine is a plugin for the developer’s editor that uses AI machine learning to help developers write code more quickly, accurately, and easily. This is achieved by automatically completing common code actions, identifying errors, and providing feedback on coding style. This allows developers to focus on the code itself and not on the mundane tasks that can often slow them down.
Regularly backing up your code is one of the most important things you can do for agile software development. It helps ensure you don’t lose any work if something goes wrong with your computer or software, and it also makes it easier to track changes and keep track of who made which changes and when.
Most code-backup software will allow you to save different versions of your code, so you can easily go back to an earlier version if you need to. This is especially helpful if you’re working on a big project and you need to undo a change that didn’t turn out the way you wanted.
Low-code development platforms can help speed up the agile software development process by allowing developers to quickly create prototypes and test them out. These tools also make it easy to make changes to the code, which allows for faster feedback cycles.
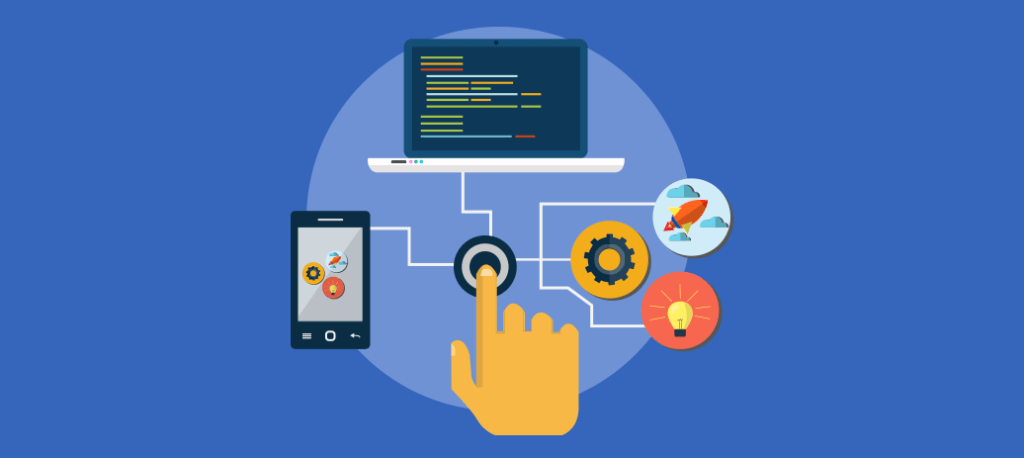
Source: API Open Studio
In addition, low-code development platforms can help reduce the amount of time needed to create a finished product. This is because these tools allow developers to create code without needing to know how to write it from scratch. This can be a huge time-saver for developers who are familiar with agile development but are not as familiar with coding.
It is important that everyone is on the same page and that team members are using the same terminology. One way to ensure this is to standardise the headers for different modules. This will help to ensure that the code is properly organised and that everyone is aware of the module’s purpose.
In general, there are three main types of headers that can be used in agile software development:
Feature headers should be used to identify the features that are being developed. This will help to keep track of which features have been implemented and which ones are still pending.
Module headers should be used to identify the modules that are being developed. This will help to keep track of which modules have been implemented and which ones are still pending.
Component headers should be used to identify the components that are being developed. This will help to keep track of which components have been implemented and which ones are still pending.
There are a number of benefits to peer reviews. Firstly, they help to ensure that the team is constantly producing high-quality code. They also help to identify problems and potential improvements early on, before they become bigger issues. Peer reviews also enable teams to build team cohesion, as team members learn to work together and give each other feedback.
The key to getting the most out of peer reviews is to make sure that they are conducted in a constructive manner. Team members should be open to feedback and be willing to listen to suggestions for improvement. Peer reviews can be a great way for teams to continue to improve their agile process.
Coding practices have come a long way in the past few years. The use of agile software development practices has helped teams produce better code in a more timely fashion. However, with the ever-growing demands of the business world, we need faster and easier ways to write code. Tabnine is the answer to that need.
Tabnine is a code auto-completion tool that allows developers to quickly and easily write code. It speeds up the coding process by automatically completing code for the developer, which allows them more time to focus on the task at hand, rather than having to spend time looking up code snippets.