When you first start to code, having pretty colors in your editor and terminal is not the first thing on your list of priorities. As you spend more and more time staring at code editors and terminal outputs, you’ll realize that having an IntelliJ color theme that is comfortable for your eyes can make all the difference. It’s simply much easier to get more work done without strained eyes and a splitting headache.
This post features the top five IntelliJ themes recommended by developers who spend most of their waking hours coding, and important tips for selecting the perfect theme to boost your productivity.
Selecting the perfect IntelliJ theme for you is not about comparing theme ratings online or going for the most maintained theme plugin package out there. Before you scroll down to our list of recommended IntelliJ themes, there are a few things to consider.

Look Yourself In The Eyes – Your Unique Needs
No two people have the same eyes. Yours might be lighter in color and thus more sensitive to light, or you might be fully (or partially) color blind. Most likely, you can get some relevant information from your optometrist, after she’s done frowning at the fact you spend so many hours in front of a computer screen. There’s also no shortage of online and offline tests for color blindness.
However, knowing the unique preferences of your eyes doesn’t necessarily mean you’ll know right off the bat what the color scheme of your development environment should be. Since your eyes are unique, some experimentation will be necessary, as well as adjustment of (or to) your coding environment.
Look Around You – Ambient Lighting, Hardware, and Multitasking
The light around you has direct impact on how your eyes react to what is in front of them. This is one of the reasons your phone automatically changes brightness to make it easier for you to see the screen taking photos at a picnic, while not being blinded by it in a dark room.
When coding in a brightly lit environment like the beach in summer (which might not be an ideal place to work as a rule) using a dark scheme would strain your eyes. On the other hand, when coding in the office (or your bedroom) in the middle of the night, a light theme will feel like it’s scratching your cornea.

It’s not only ambient lighting conditions that you should consider, but also the windows and content you see when switching between tasks on your desktop. For example, if you tend to switch between Google Docs in your browser and your IDE, the difference between the brightness of the default Google Docs view and a dark IDE theme will be torture on your eyes.
If you’re the type to care about your sleep as much as your eyes, you most likely run some kind of app or software to increase the color temperature and reduce brightness of your display according to the time of day. When trying out IntelliJ themes, be sure to test them at different times and locations (when applicable) and adjust screen or app settings accordingly.
This eternal battle between the powers of light and the powers of dark isn’t just the main storyline of the Star Wars universe, but also an ongoing argument among developers when it comes to the color schemes of their working environment.

However, since the intensity of light around your workspace might change, you should adjust. Some themes actually offer a light and dark flavor of the same scheme as to not confuse your brain with too many color changes when switching between your light and dark themes of choice at different locations or times of day.
With only one of our five recommended themes for IntelliJ being package with the installation file, it’s important you know how to import the theme of your choice.
Windows and Linux: File > Settings > Editor > Color Scheme
macOS: IntelliJ IDEA > Preferences > Editor > Color Scheme

To remain relevant in the constantly changing landscape of software development, it is essential to stay up-to-date with the latest advancements and trends. Keeping abreast of new technologies and practices ensures that you are equipped with the knowledge and skills needed to succeed in this dynamic field. Learn more about how to utilize AI to optimize your software engineering in 2023.

Now that you know how to choose, the only thing we can do to help is narrow the list of theme plugins for you to download and test to just five options. One of these is sure to cover all your needs.
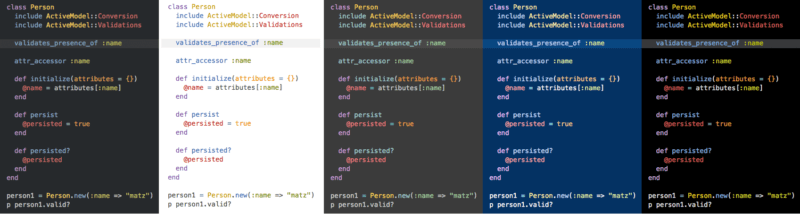
Tomorrow is the day everything gets done, and nothing makes you code faster than a deadline that is tomorrow. This may or may not be the origin of the name of this multi-variant package of IntelliJ color themes, that remains very popular even after its maintainer has moved onto a different theme (base16).
Tomorrow’s theme embraces warm pastel colors with sensible syntax highlighting across its five variants: Tomorrow, Tomorrow Night, Tomorrow Eighties, Tomorrow Blue and Tomorrow Night Bright.
 [DOWNLOAD]
With dark, light and even blue color schemes in the same theme, you can easily switch between “modes” to adjust the contrast and brightness to your desktop environment and ambient lighting.
Another reason for the popularity of Tomorrow is its broad support of text editors and platforms. Even if one of your apps of choice doesn’t have a downloadable package, the hex values of all the colors used are listed in the repository.
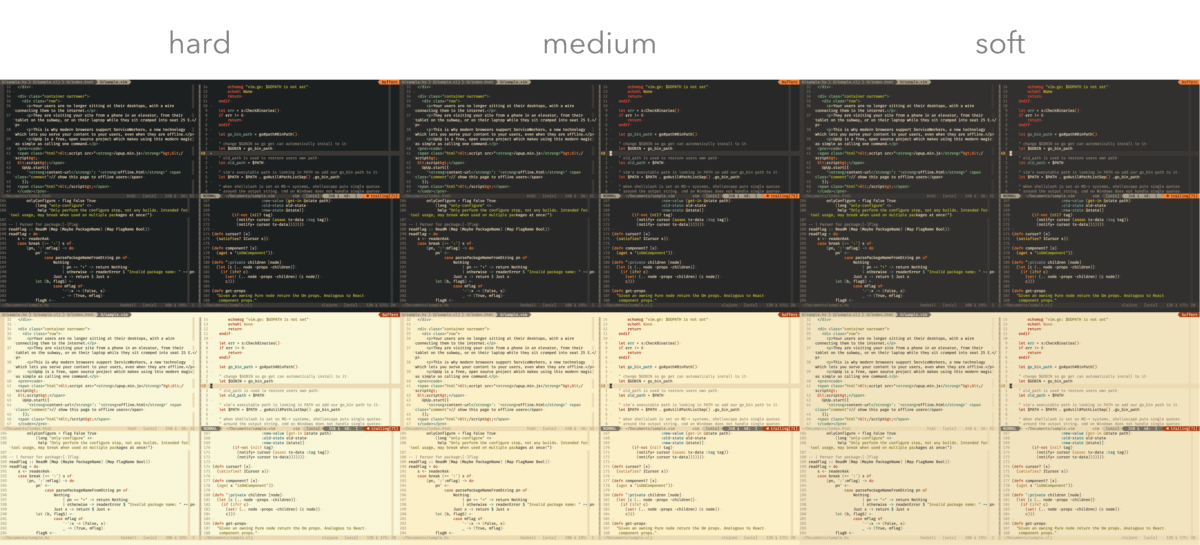
If you’re looking for a retro look with a reddish tint for those late-night coding sessions, Gruvbox is an IntelliJ theme you should absolutely check out. While minimalistic, Gruvbox comes very close to providing that perfect balance between easily distinguishable colors with sufficient contrast and eye comfort.
Available in both light and dark flavors, Gruvbox also offers three modes of contrast for both, making it particularly easy to switch between light / dark and then adjust to ambient lighting or color-correction software.
 [DOWNLOAD]
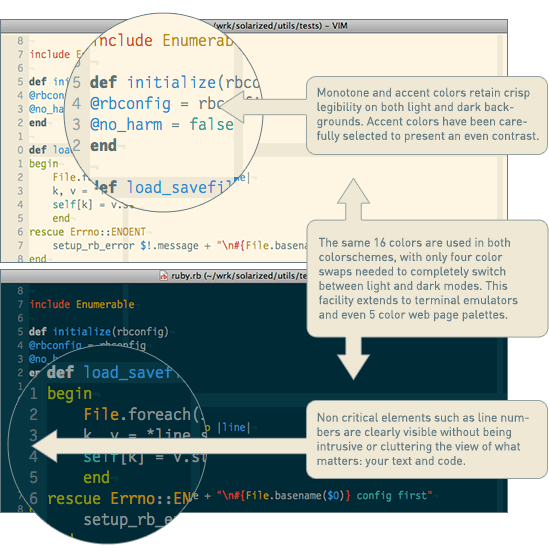
Another theme package with both light and dark variants that has rightfully earned its massive popularity is Solarized. With the designer behind it clearly showing a deep understanding of color theory, this is possibly the most professionally compiled theme out-there.
Solarized does an amazing job at maintaining legibility and color consistency between dark and light themes, making it a perfect choice for users working in different lighting conditions with the same machine.
In addition to the IntelliJ package, there is an abundance of plug-ins for other terminal software, code editors and other apps.
 [DOWNLOAD]
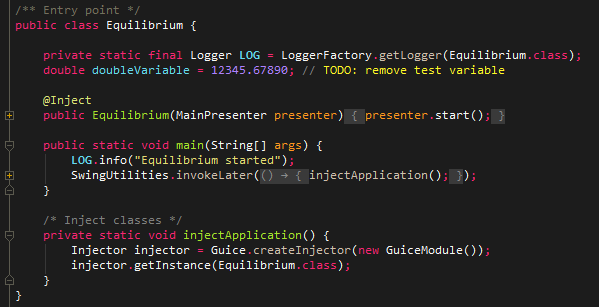
One of the most popular dark themes for IntelliJ is Monokai. It draws heavily from the original Monokai theme designed in 2006 by Wimer Hazenberg for the Sublime Text editor and by now adopted by most text editors.
Offering superb contrast while still being easy on the eyes with a not-quite-black background, Monokai is one of the IntelliJ themes of choice for developers and users with color-blindness.
 [DOWNLOAD]
For most users, Darcula is the out-of-the-box IntelliJ theme but that doesn’t mean it’s no good. This classic dark theme features cheerful pastels on a bluish dark grey background.
Choosing a theme for your IDE is probably not as big a decision as deciding the Titanic didn’t need a test drive before its maiden voyage. But, still, it is your main work surface and you should feel comfortable and productive when you work. If I left out your favorite theme or there’s a new one out please let me know in the comments.
Tabnine is an intelligent, AI-driven code completion tool that can cut your coding time, reduce mistakes, and make best practice suggestions.
[cta_btn url=”https://www.tabnine.com/pricing/landing” label=”Start a free trial”]
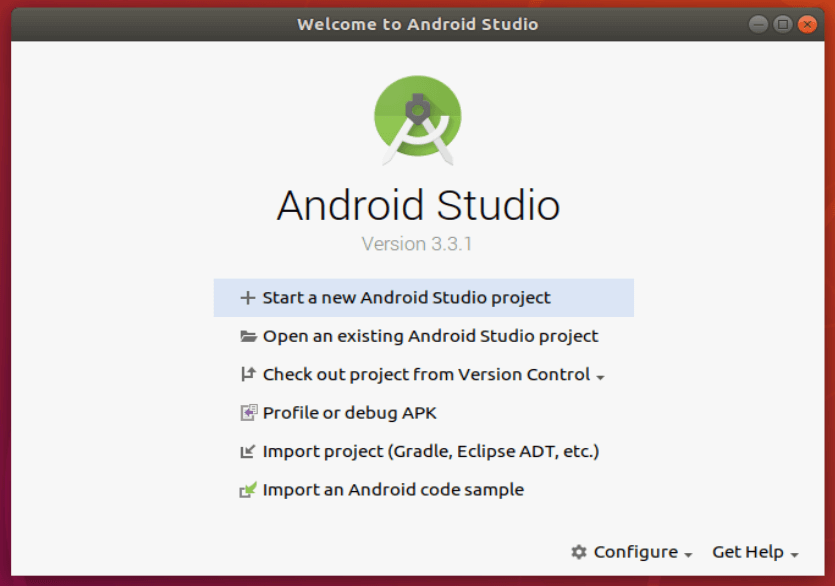
If you’re an Ubuntu user developing an Android app, or an open source enthusiast looking to tinker with the OS without bricking your device, the official Android Studio IDE (integrated development environment) from Google is a piece of software you need to install. This guide will walk you through the installation process of Android Studio on Ubuntu 16.04/17.10/18.04, and is suited for users of all levels.
Like with most actions and applications on any Linux machine, there are multiple ways to install Android Studio on Ubuntu. Included in this guide are the most straightforward couple:
To run Android Studio smoothly on your machine, you will need:
Before you install the Android Studio IDE, you need to make sure your Ubuntu installation is armed and ready with the recommended Java development kit for Android Studio – Oracle JDK.
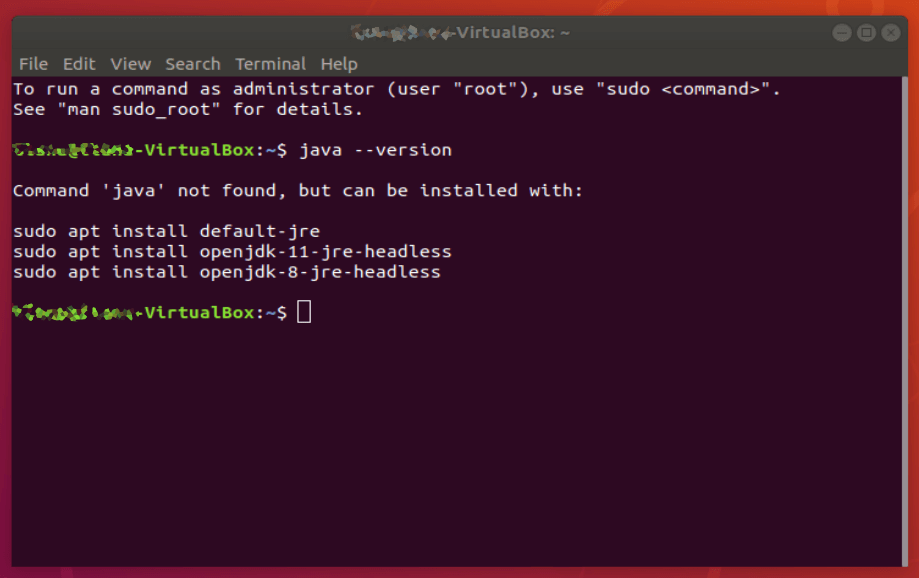
To check the version of Java currently running on your machine, use the terminal to run the following command:
java --version
If you don’t have Java installed, the output should be something like:
Command ‘java’ not found, but can be installed with:
sudo apt install default-jre
sudo apt install openjdk-11-jre-headless
sudo apt install openjdk-8-jre-headless
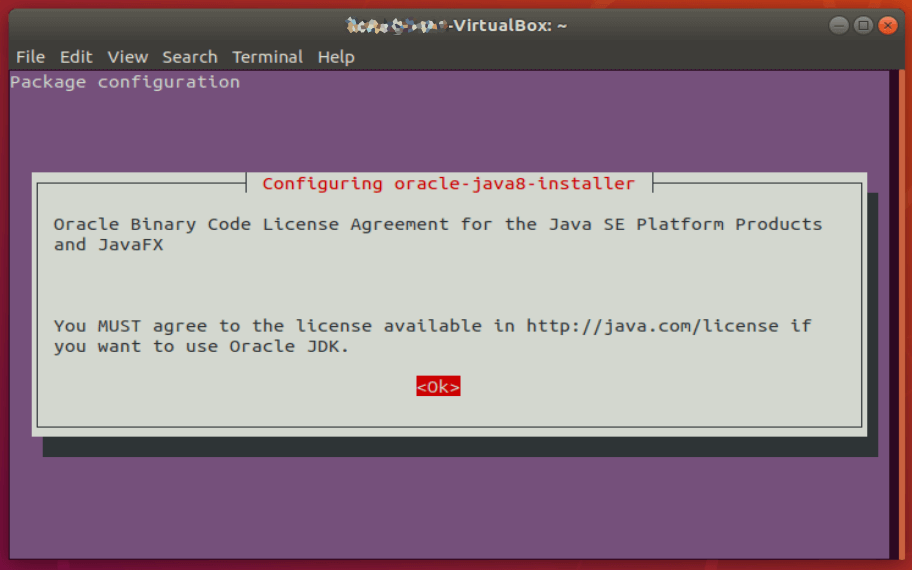
This is Ubuntu giving you hints on how to set up one of the default Java engines on your machine. Since Android Studio can be finicky about its Java, we’re going to ignore these options and install the Oracle JDK with the following commands:
sudo add-apt-repository ppa:webupd8team/java
sudo apt-get update
sudo apt-get install oracle-java8-installer
The download may take some time, so depending on your internet speed, this might be a good time to get some Java (or other caffeinated beverage) of your own. Once the download and installation are done, make sure to set the Oracle Java as the default:
sudo apt-get install oracle-java8-set-default
Next, verify the installation by typing:
javac --version
The result you should get is something like:
javac 1.8.0_201
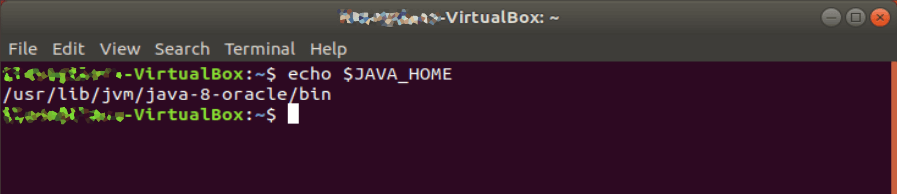
Make sure to note the path of your Java installation. If you followed the instructions above, it will be /usr/lib/jvm/java-8-oracle/bin .
Finally, you will need to set the JAVA_HOME environment variable in Ubuntu to the location of your JDK installation. To do that, you will need to edit the .bashrc file. Switch to root by typing:
sudo su
To edit the bash file, enter:
gedit .bashrc

At the very end of the file, after the last fi, add the following lines:
JAVA_HOME=/usr/lib/jvm/java-8-oracle/bin
export JAVA_HOME
PATH=$PATH:$JAVA_HOME
export PATH
Save the bash file, restart the terminal, and type echo $JAVA_HOME to make sure the path is properly set.
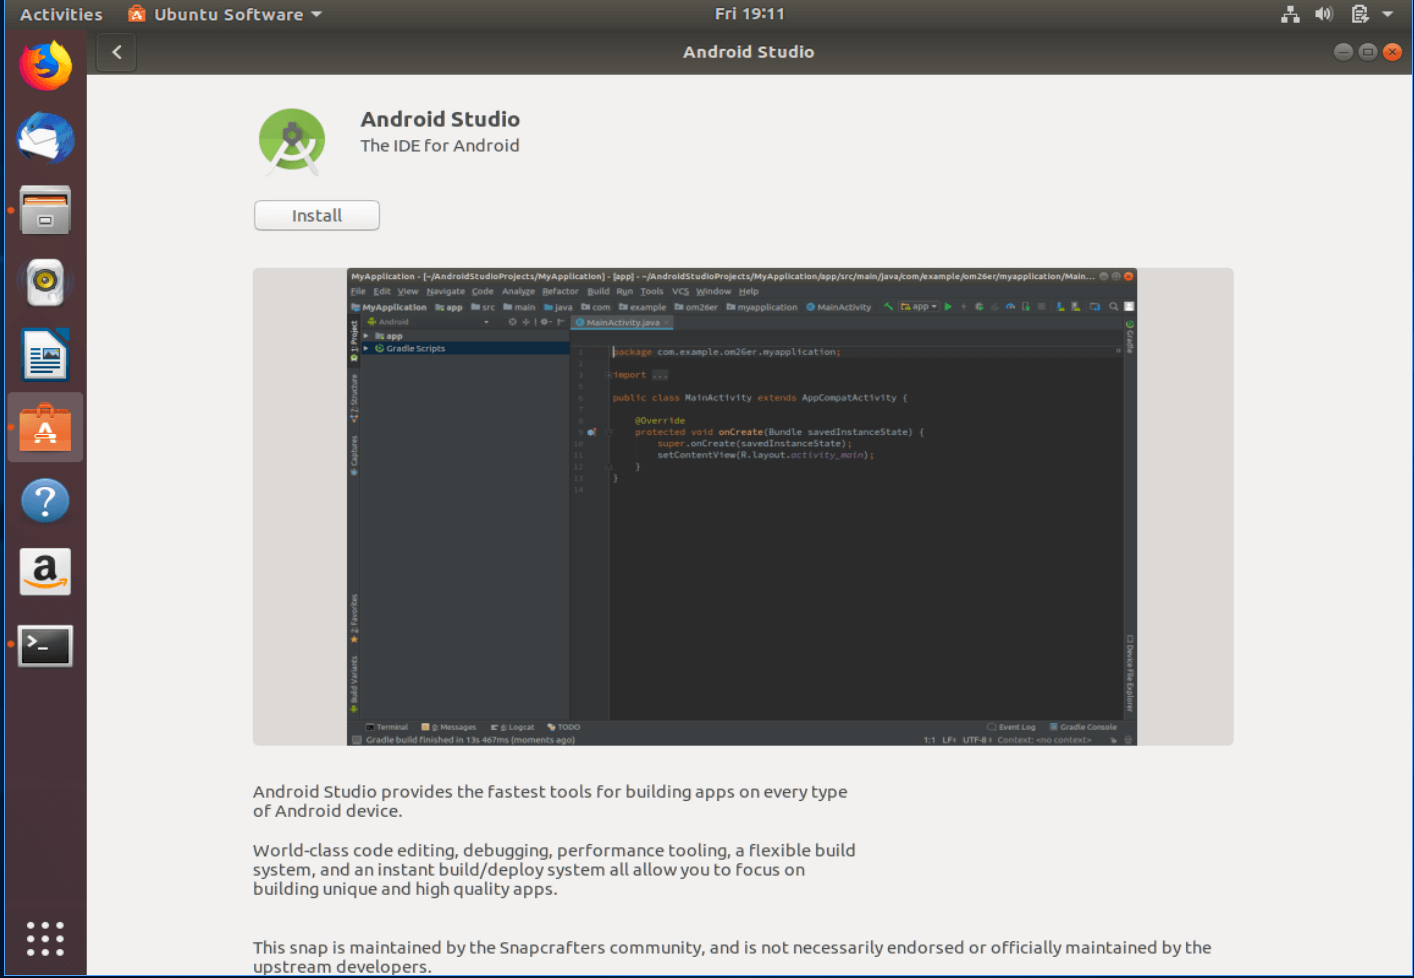
Linux is traditionally used in CLI (command line interface) mode (or terminal), but Ubuntu is working hard to make Linux accessible even to those of us raised on Windows and Mac and unused to typing commands. Part of that effort was including popular software packages and apps in the Ubuntu version of the app store – the Software Center – in the form of Snap packages. The installation process is really as easy as it gets.

Locate the Ubuntu Software Center icon in your taskbar and use the search functionality to find Android Studio. Click install and let it download and run initial setup.
Once done, click Launch to run the Setup Wizard and proceed to download additional components and packages to complete the installation. Note that this too may take some time (depending on the speed of your connection and components you chose to install) so go ahead and grab another cup of coffee.
Upon completion, you will be able to start using Android Studio with a new or existing project.
If you prefer the official download over the community-maintained Snap, you can download and install Android Studio manually and according to the instructions released by Google.
Start by downloading the Linux package of Android Studio from the Google website. Yup, it’s time to get some coffee while the 1 GB file downloads.
Right click the zip file in the file browser and choose “Extract Here”. You can move the file out of the Downloads folder later, if you wish.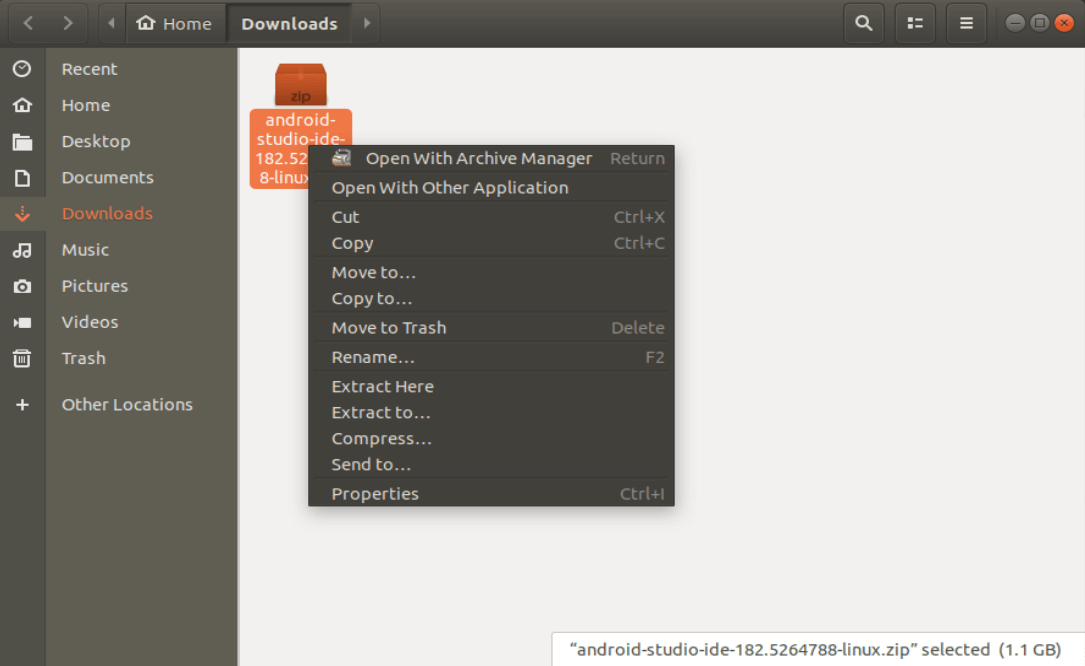
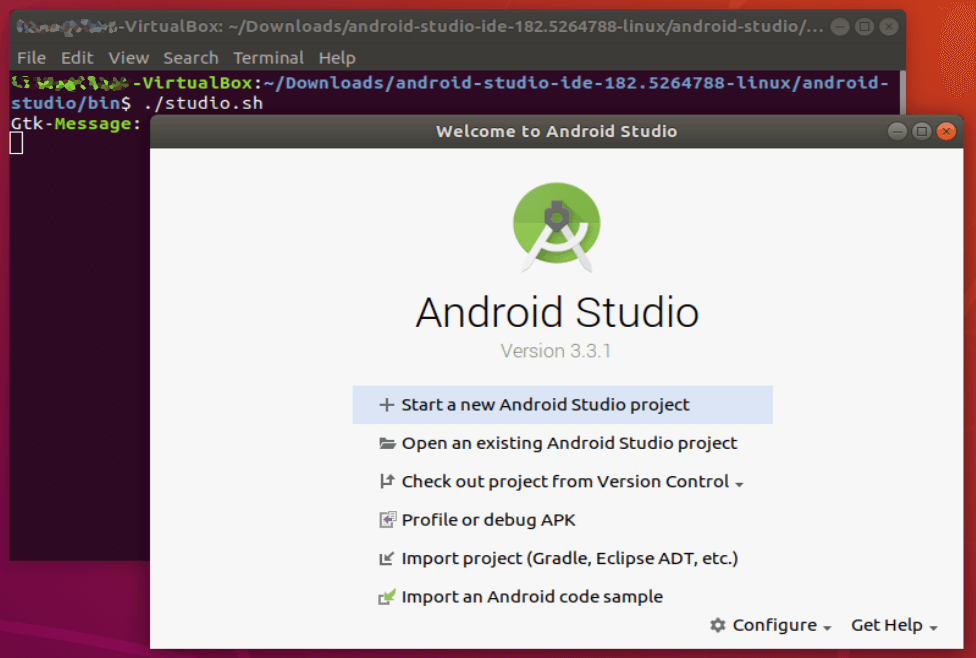
Navigate to the android-studio/bin/ directory, and open a terminal by right clicking and choosing “Open in Terminal”.
In the terminal, execute studio.sh by entering:
./studio.sh
If you have previous Android Studio settings you’d like to import, select them now. If not, proceed with new setting and click OK.
The Setup Wizard will launch, and proceed to download additional components and packages to complete the installation. Note that this too may take some time (depending on the speed of your connection and components you chose to install) so go ahead and grab another cup of coffee.
Once all the components you selected finish downloading, the app will launch and you can start working on your code.
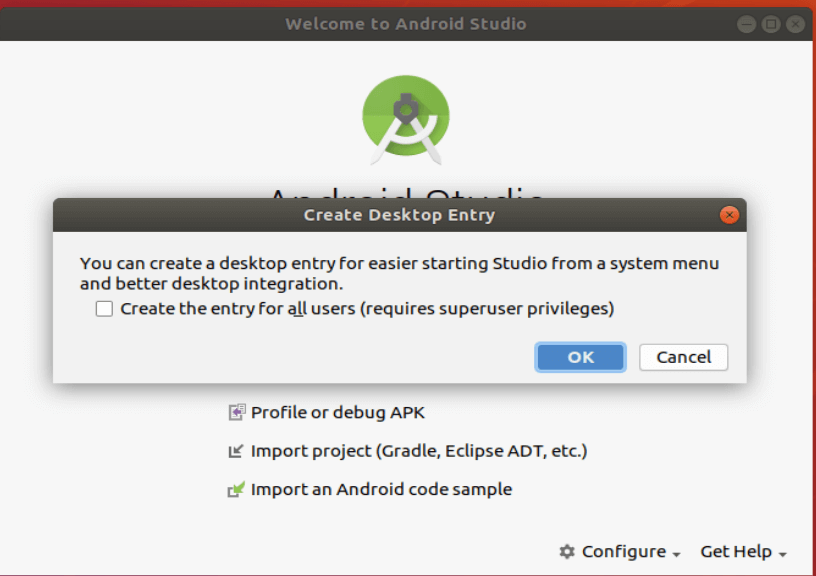
To make sure you can access the app quickly and without the terminal, choose “Configure” on the bottom right and “Create Desktop Entry”.
Caffeinated enough from the download and installation process? Good! Now get coding.
