WebStorm is a JetBrains IDE that prides itself on being the “smartest JavaScript IDE” on the market. But is it? And what exactly can WebStorm do for you?
WebStorm is part of JetBrains’ suite of language-specific IDEs. This specialized tool focuses on JavaScript development and features an extensive suite of built-in developer tools, fast navigation, search, customizable environments, and real-time teamwork integrations.
One of the main features of WebStorm is its support for TypeScript source code. WebStorm recognizes both .ts and .tsx files with code support systems to make your workflow as seamless as possible.
For JavaScript developers, especially those working with Angular, TypeScript support in an IDE can make or break the productivity glass ceiling.
Here is a quick guide on how to run TypeScript in WebStorm and develop your first app to get you started.
When it comes to TypeScript with WebStorm, you don’t have to do much. This is because WebStorm comes with built-in project templates that you can use as you start.
When you start WebStorm, you will have the option of choosing an empty project or a boilerplate setup for the most popular JavaScript libraries and frameworks such as Angular, Cordova, Express, Meteor, Node.js, React, React Native, and Vue.js.
If you are creating a new project from scratch and require a tsconfig.json file, the boilerplate can easily be booted up by going to File > New > tsconfig.json File.

You will get a default tsconfig.json file that looks something like this:
| { “compilerOptions”: { “module”: “commonjs”, “target”: “es5”, “sourceMap”: true }, “exclude”: [ “node_modules” ] } |
To set up your TypeScript project, the convention is to have a src folder and a build folder. The src folder is where all your code will go, while the build folder is where your JavaScript build outputs will compile to.
Once this is completed, you need to add “outDir” : “build” to your compilerOptions. The build at outDir corresponds with the build folder you’ve created. In theory, this can be anything you want, as long the name corresponds to one another.
To tell TypeScript which folder you want to build, add the folder path to include.
Here is an example of the final TypeScript tsconfig.json file setup with build and src directories:
| { “compilerOptions”: { “module”: “commonjs”, “target”: “es5”, “sourceMap”: true, “outDir”: “build” }, “exclude”: [ “node_modules” ], “include”: [ “src/scripts/**/*” ] } |
Now that we’ve got the basics all done, you can start creating your TypeScript project inside WebStorm. The next step will be to compile TypeScript in WebStorm.
The easiest way is to right-click anywhere on your TypeScript workspace, and right at the bottom of the list that shows is a Compile TypeScript option. Once you’ve clicked on that, your TypeScript code will compile in WebStorm for you automatically.

It is good to note that for TypeScript to compile correctly, the include inside your tsconfig.json must correspond with the file path. In the screenshot above, the file path for the file sits inside src/scripts. Our include portion corresponds with this:
| … “include”: [ “src/scripts/**/*” ] … |
There are multiple ways to run your TypeScript. One way is to and select Run.

Alternatively, you can use the keyboard command combination Ctrl + Shift + F10. These two options will bring up a localhost page on your default browser.
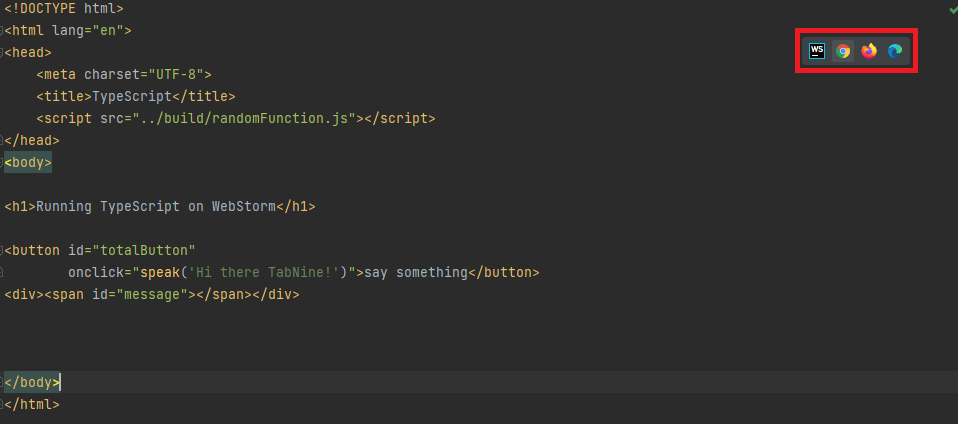
However, if you want to test on a different browser, you can select from one of the browser icons located on the top right of your screen – as highlighted in red below.
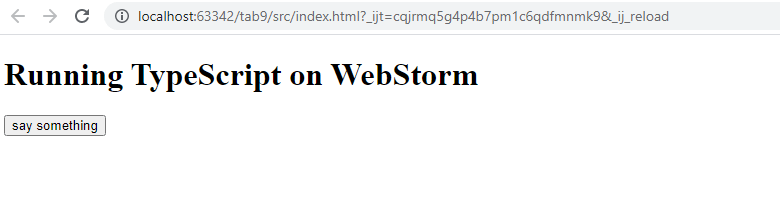
Here is a screenshot of the localhost generated based on the code above.
Once you have your localhost up, WebStorm sets you up with hot reloading automatically. This means that you don’t have to intervene with a page refresh every time you alter your code.
At some point, you’re going to want to debug your code. While console.log() may help you track things down, WebStorm’s debugging tools can speed up the process without littering your code. Not only that, using console.log() to debug is not the best practice.
While console.log can help with particular instances, most of the time, what you need is for your code to slow down. This is so you can mentally digest what is going on and pinpoint precisely what is happening, why things are happening, and if it contributes to the bug you are trying to fix.
When it comes to TypeScript, you are most likely working on a single page application (SPA) or node.js based server-side application. This means you are also dealing with things like lifecycles. Using breakpoints lets you pause your code so you can have a chance to see the line-by-line impact for each region of code.
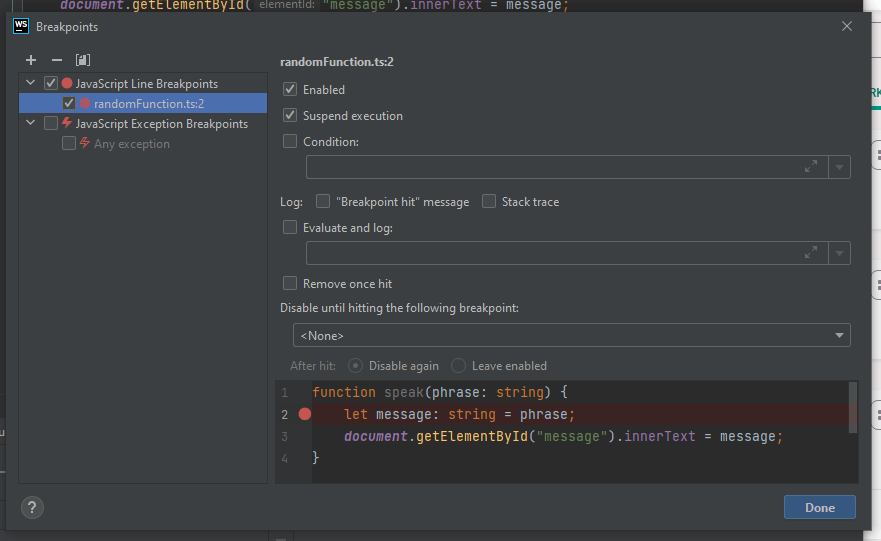
To debug TypeScript in WebStorm, you can create breakpoints in your code by click on the line number. This will produce a red dot, where the code will be paused once it hits the breakpoint.

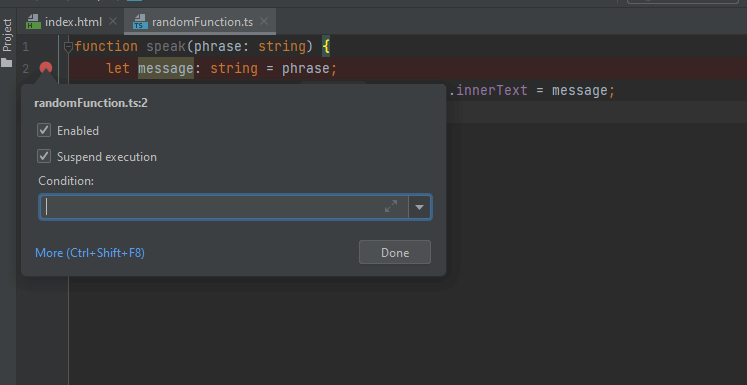
If you right-click on your breakpoint’s red dot, you can also configure it with conditionals, logging, stack tracing and disable it based on exceptions. These features can come in handy when you want to finetune your debugging process in WebStorm for TypeScript.
Here is a screenshot of what it looks like:
To bring up more options, click on More or Ctrl + Shift + F8. Here is the rest of what WebStorm offers for TypeScript debugging.
To run the debugger, click on the little green bug icon. This will bring up a new localhost window, where you can test out your code process flow.

Here is an example of what WebStorm’s TypeScript debugger looks like in action with breakpoints:
When it comes to TypeScript, WebStorm does most of the heavy lifting for you. There is minimal setup – other than setting up your project. Running TypeScript in WebStorm is a breeze, with no need to deal with command lines, configuring localhosts, or too many steps for compiling TypeScript into JavaScript code. Everything comes out of the box, ready to go, and fully optimized for TypeScript projects.
Debugging is integrated by default, so you don’t need to set it up or download additional plugins to get started. For TypeScript in WebStorm, things work.
Overall, if you want a seamless experience, give WebStorm a try for your next TypeScript project and experience the difference in your coding workflow. While this isn’t a free IDE, the subscription cost is worth the benefits that it brings to your ability to produce code quickly.
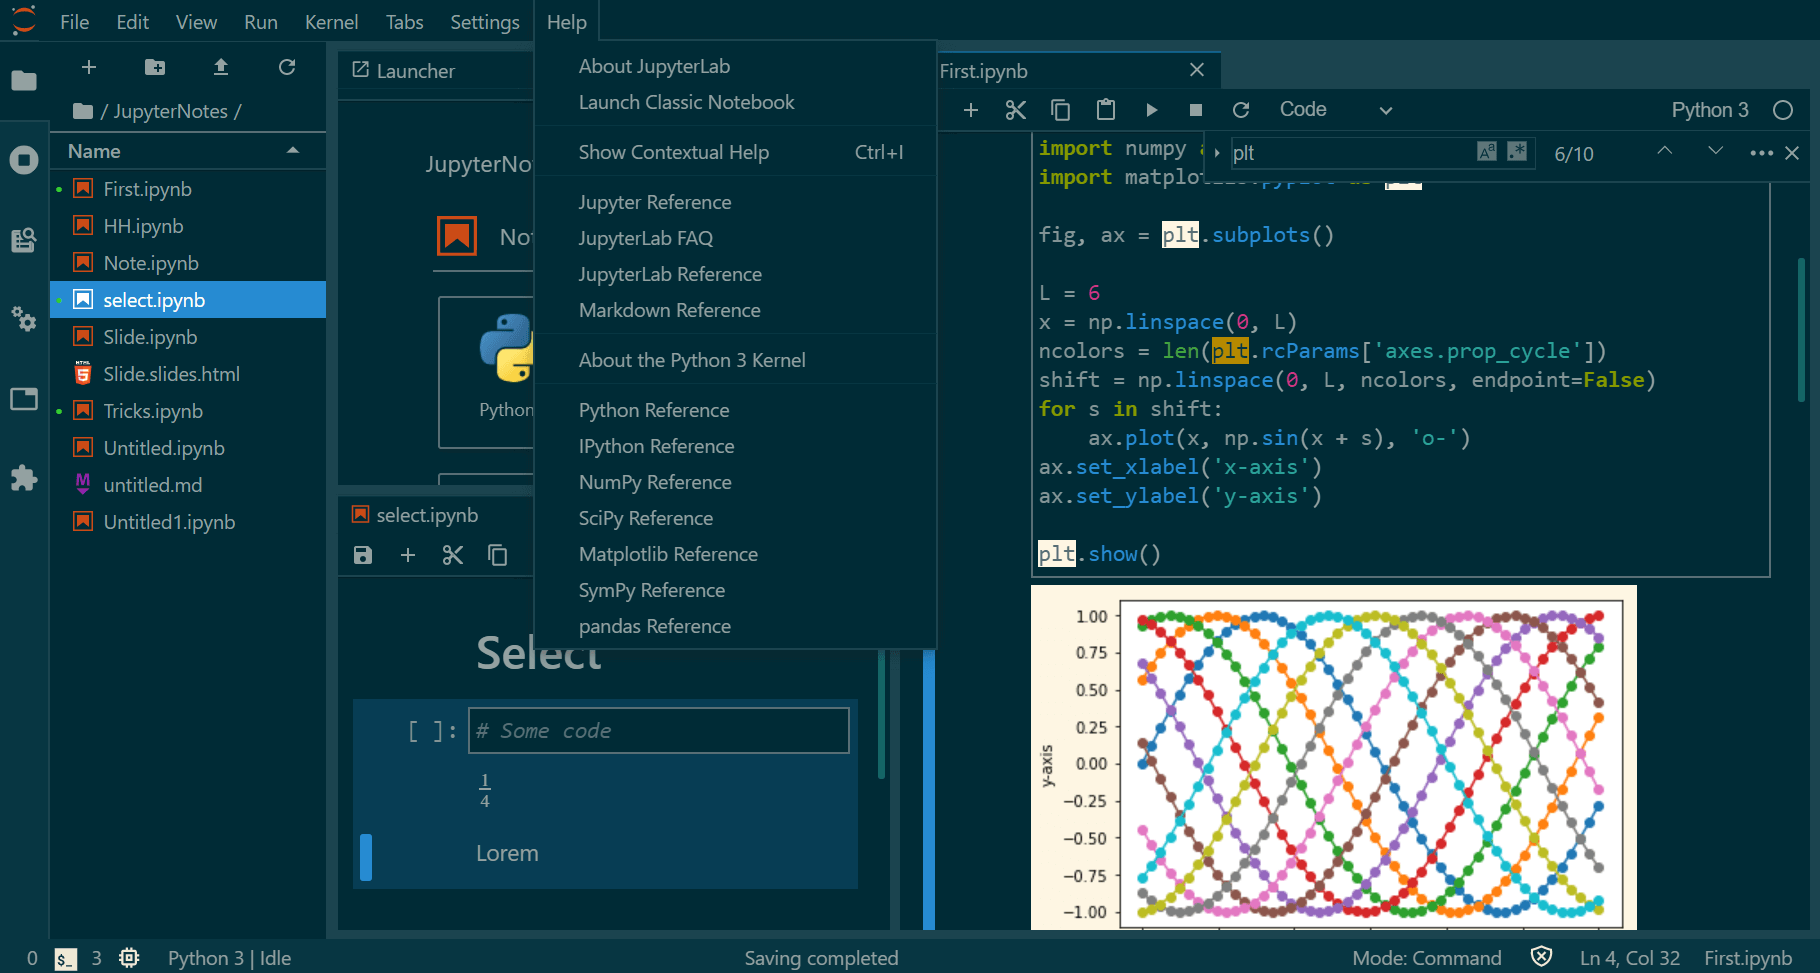
If you’re a data scientist, you must have heard about JupyterLab. JupyterLab is the next evolution of Jupyter Notebooks and a full-fledged IDE. It is a culmination of usability and features that give Data Scientists all the tools they need to analyze data and present it in a way non-technical people can quickly grasp. Do you want to make JupyterLab your home for all things data science? Here’s what you need to know and have.
JupyterLab is the tool that is synonymous with data science. With a robust set of features, including graph drawing, real-time code execution, a built-in terminal, and everything you need for data science coding.
The language support is broad and covers your major data science languages: Python, Julia, R, and others. JupyterLab runs as a web application, so you can try out the web version or install it on your server. It is easy to get into, even without knowledge of data science.
Above all, JupyterLab is designed to be extensible to let you get the most out of your work environment with extensions. Need a feature? You can write one. However, it is likely someone already has.
Even the best hand-made glove will not fit perfectly without a tailor taking your measurements. Just like the glove, a work environment can never suit you perfectly without some adjustments. Extensions provide those adjustments to JupyterLab to make it fit you like a glove.
Some Extensions are universally useful, and nearly everyone will benefit from them, while others may be more niche, and their usefulness depends on how you use JupyterLab. Regardless, here are the top 9 extensions you should know and see how they fit your hands.
There are two ways to install extensions in JupyterLab. The first is for CLI lovers, which, as you might have guessed, includes a simple command typed into the console. Sometimes you would need more than one command if there are dependencies. But generally, it would like this:
jupyter labextension install @jupyterlab/[extension]
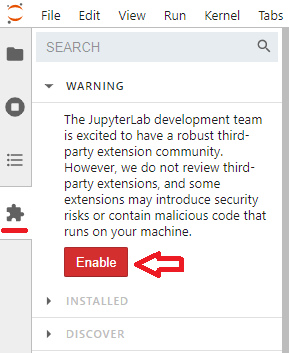
The other method is using the extension manager. Start by clicking the puzzle icon, and then enable.
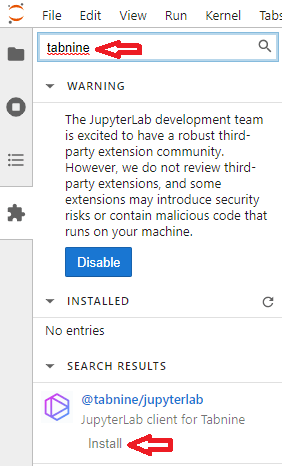
Once extensions are enabled, you can use the search bar to find the extension you want and install it.
It is all quite as simple as that!
A debugger is a core feature when working with code, and JupyterLab is built to debug. How core is it? This extension is now shipped with JupyterLab 3. However, if you’re using JupyterLab 2 or earlier, you’ll want to add this extension to your arsenal.
The Debugger extension allows visual debugging, set breakpoints, and most anything else you expect a debugger to do. So really, either you already have it because you’re running the latest version of JupyterLab, or you should install it.

Typing out code without auto-complete features is a pain, especially when starting out. Besides the time wasted typing out method names, a lack of auto-complete encourages shorter naming styles, which is less than ideal.
Auto-complete is an essential part of an efficient development environment. TabNine uses machine learning to complete the names of methods or variables you have started typing and accurately guess what you might want to write next before you begin. That may include method names from libraries that you forgot how they’re called, which saves a lot of time Googling.
When developing any code, even with the fewest lines, you would be remiss not to use Git. Git allows tracking changes over time, so you can feel secure that your code will not be lost, overwritten, or modified erroneously. Coding without Git is just teasing Murphy’s Law.
Git extension for Jupyter is a clean integration directly into the software. Using Git from inside Jupyter is faster, easier and will help you develop the habit of pushing code changes more frequently. This can potentially save you from loss of work and help you make more granular changes to roll back to in case of bugs.
Google Drive has many uses. It is a quick and easy way to share files with others or use files shared with you, especially with non-technical people unfamiliar with Git. With this Google Drive Extension, you can do everything right inside Jupyter. A comprehensive work environment makes everything go smoother.
Code formatters are helpful tools that make your code more readable. Formatters are not only necessary when collaborating with others, but even if you go back and read your code, you will find that a well-formatted code is easier to read.
This extension is a universal code formatter that can use an array of external rules, even chaining several together.
The debugger extension helps figure out problems using breakpoints and kernel stepper. Variable Inspector reveals the values of any number of things from visual components to variables in the code. A tool you’d be glad to have the very first time you encounter an issue. Which, when coding, is a certainty.
This extension will help you transition from Jupyter Notebooks to JupyterLab. If you have been using Jupyter notebook templates, this extension converts them to Jupyter Lab so you can keep using them. Even if you’re new to Jupyter, you may find some older Jupyter Notebook templates you wish to use. This extension will let you do so.
If you are using Tensorboard for visualization, or if you want to, this extension is invaluable. Integrating Tesnorboard into your presentation can elevate it with graphs and visualizations you wouldn’t be able to get otherwise. Note that using Tensorboard requires both a server-side and front-end extension.
Do you work late? Do your eyes get strained looking at white backgrounds all day? Look no further than Solarized Dark Extension. Your eyes will thank you for it.
There are, of course, more extensions out there, and I encourage you to look over the extension manager and find the ones you need. But those top 9 should get you set up to start working quickly.
If I had to pick three essential extensions, aside from the debugger now shipped with JupyterLabs, I would tell you to install the Git extension because everyone should be using Git with their projects. TabNine, to make your coding faster and more efficient. And Solarized Dark theme, because eye strain is a hell best avoided.
PyCharm is the IDE that many Pythonists choose over other alternatives like Visual Studio and Sublime. The Community version is free to download and use with no caveats or trial periods attached.
When it comes to Python, the word ‘Django’ is not too far away. But what is Django to Python? Why is it such a big deal? And what is the best PyCharm setup for Django development?
Django is a Python Web framework that lets you create frontends with backends and APIs quickly and easily.
When it comes to web development, think of a cake. It has many layers to it. So imagine Python as the base language — or the base ingredients that are needed to make the cake. Django takes Python and pre-arranges everything into modules that you can tap into for features and functionality. You, the developer, take these modules and mix them together to form the different parts of your application — your cake.
Most web applications run the same tasks and have the exact requirements such as HTTP requests, creating views, booting up forms, templating, managing files, site-maps, and caching. Django consolidates these into easily accessible pieces that are ready-to-use ingredients for your app.
If you’re coming into Django as a JavaScript developer, you know that different frameworks and libraries are needed to get the frontend running. You also know you will need another codebase for the backend.
However, with Django and Python, all the different layers of web application development are sorted for you. The logical setup for Django lets you make apps into one space rather than force you to split it across multiple projects where you end up needing to coordinate everything for things to work seamlessly.
In part, Django is massive in the world of Python because there is no other actual competition that’s supercharged with features and comes as fully packed. Sure, there is Flask – but that’s more lightweight and doesn’t have frontend support like Django.
PyCharm is best known for its rich feature set. The IDE packs many abilities like build-in intelligent code completion, full-text search with regex support, syntax highlighting, bracket matching, git integration, linting with pylint, debugging, code inspection tools, and the ability to define your code snippets for commonly used patterns in your project.
Other editors like Visual Studio Code are bare-bones editors that you have to extend and configure to be a highly productive workspace. PyCharm, in contrast, comes ready to use straight out of the box. It also has more than 3000 dedicated Python-related extensions that you can use.
In addition, the professional edition of PyCharm allows for remote debugging, which lets you use tools in the IDE to run and debug code that is executing on a remote machine.
The consistent UI across all of JetBrains IDEs also enhances the user’s experience, making it easy for developers who already use any of JetBrains’ IDE to switch over to PyCharm.
PyCharm is incredibly easy for Python development, especially for Django development. All you have to do is go to the navigation bar, click on File -> New Project, and you’ll see a panel.
Look to your left and select Django. All the settings are done for you. All you have to do is set your Location and click on Create. PyCharm will do the rest.
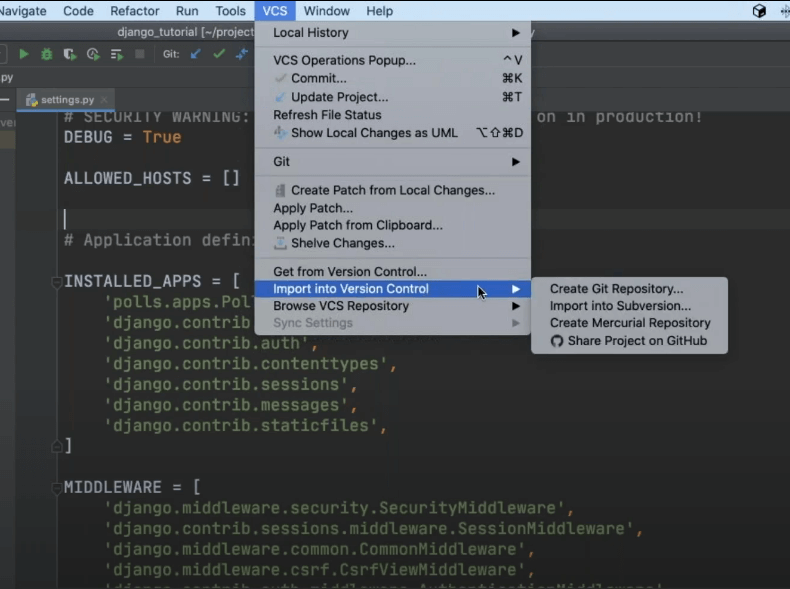
To import your Django project into GitHub, go to your navigation bar, select VCS -> Import into Version Control and select one of the options that best suit your needs.
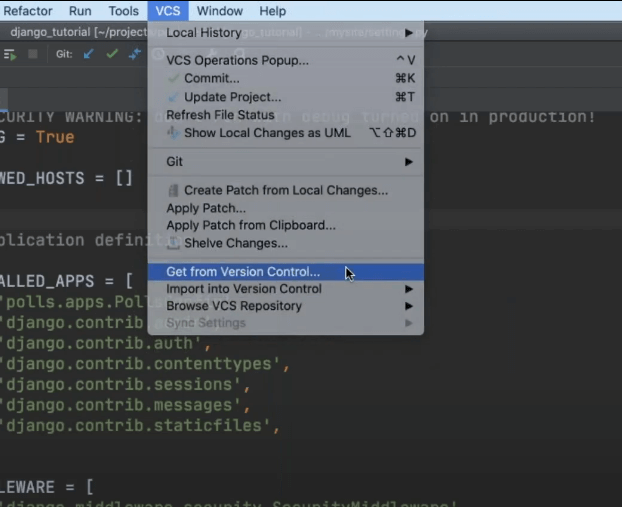
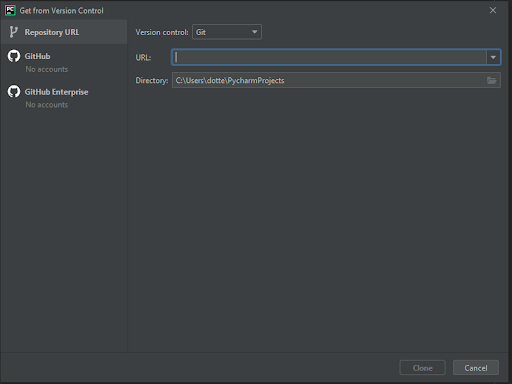
To pull your Django project from GitHub and have PyCharm set everything up (environments, internal wirings, etc.), go to your navigation bar, select VCS -> Get from Version Control… This will bring up a panel that lets you clone a project to your chosen directory.
You can clone directly from a URL, or if you’re logged in, you can search for your repository in the search bar.
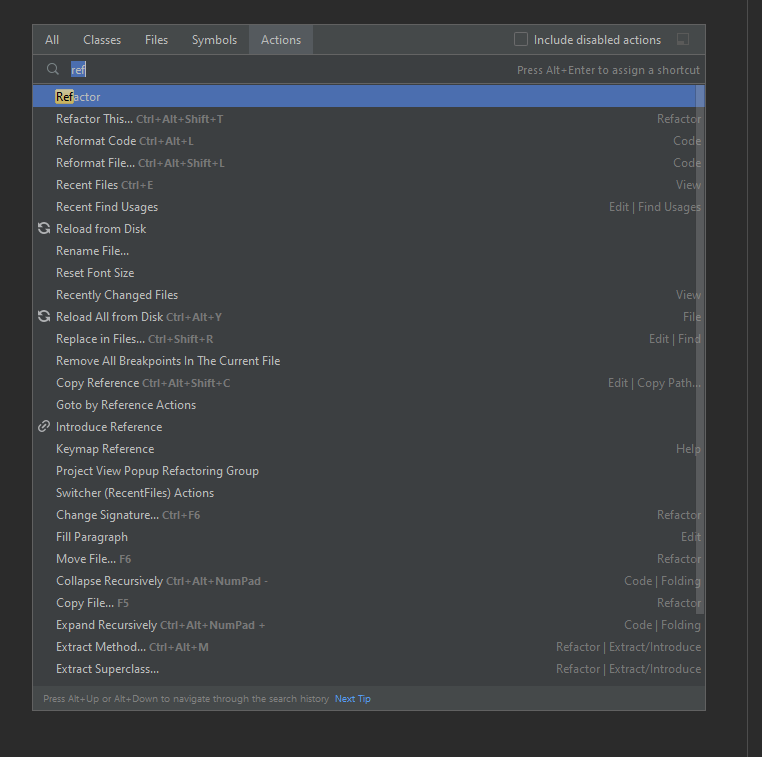
It can be annoying to try and learn all the key bindings, especially for multiple IDEs. To access all the possible key bindings and actions via a search bar, press Ctrl+Shift+A
This will bring up a search screen that looks something like this:
The purpose of IDEs is that they come ready out of the box, which means they can do many things. However, a lot of the time, we don’t need everything that an IDE offers. When features go unused and take up screen space, it can create clutter.
Things you can turn off via View -> Appearance are:
You can also turn things like tabs via Find Action. This will result in a minimalistic view so you can focus solely on your code. What you turn off is more a personal preference, but the fewer things you have on the screen, the more focused you will be. It also encourages you to navigate via your keyboard rather than your mouse.
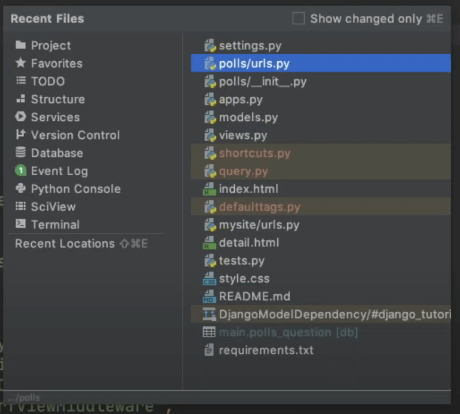
If you’ve got the minimalist setup to navigate between files quickly, you can use Ctrl+E to bring up the Recent Files popup. If you start typing, the Recent Files view will filter the files down for you.
To ensure that your code is optimized for Django, go to File -> Preferences and search template in the search bar. Look at the Editor panel, scroll down to Languages & Frameworks, and select Template Languages.
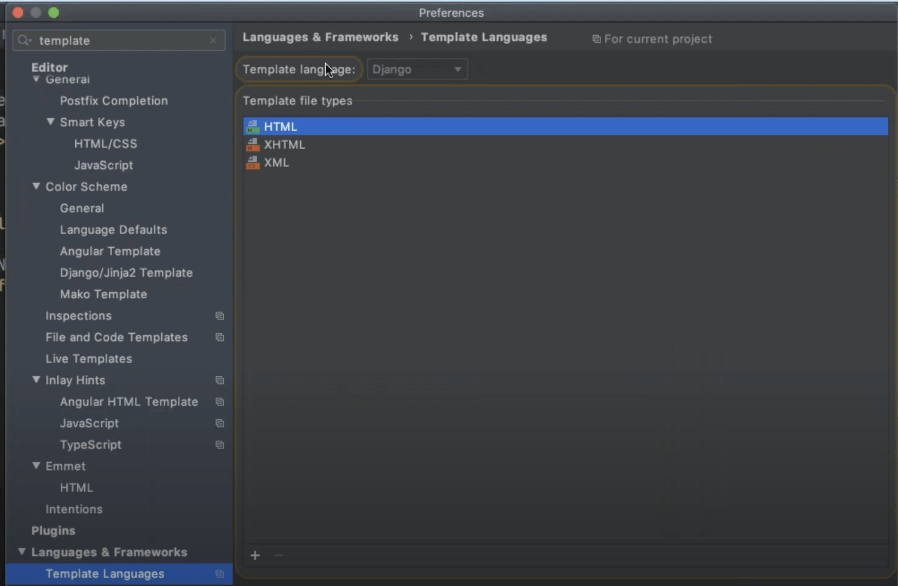
If you started the project with the Django setup, this would be automatically configured with the Django option. If not, you can use the dropdown list, and it will give you the options.
The IDE will know that you are working with a Django template file based on the code contents and syntaxes when you code.
Django is a powerful and highly productive web framework for Python. By design, PyCharm already has everything set up for you. The next step is to personalize it to your tastes. Unlike other IDEs and code editors, the PyCharm setup for Django is seamless. At a minimum, you need to remember to start up your project as a Django project.
The best PyCharm setup is one that is the most productive for your coding needs. For many developers, going minimalist by turning off everything and then using keyboard shortcuts to navigate is often the best practice and process flow for creating code quickly.
What do you need to develop in Python? The first thing on your list should be an IDE, or at the very least a code editor. Sure, you can type your code in any old text editor, including notepad.exe. But why would you want to, knowing that code editors and IDEs can make your coding experience smoother and faster?
When you search the web for the best IDE for Python development, you will get a large selection of editors and IDEs at a varying cost and versatile feature-set. On most top Python code editors lists, you will find Sublime Text, a flexible open-source text editor with many community-made plugins (packages) to extend its functionality.
The Sublime text editor is a code and text editor with a rich set of features to make your Python development (or development in most languages) seamless. Sublime Text is a lightweight code editor that, like VSCode and Atom, relies on plugins or packages to extend its functionality to a full-fledged IDE.
Being an open-source text editor, it has an avid community of developers to build different plugins that enable the IDE capabilities to the editor.
In the rapidly changing field of software development, staying informed about new technologies and practices is crucial for success. Learn how to utilize AI and optimize your software engineering skills in 2023.

To get started with Python on Sublime Text 4 (the latest version), you need to install a Sublime Text 4 and some plugins. So let’s get to it.
Download Sublime Text 4 from the downloads page. We’ll be downloading and installing the Windows version in this tutorial, but the process is similar to other supported operating systems.
Double click on the Installer you’ve downloaded to launch the installation wizard.
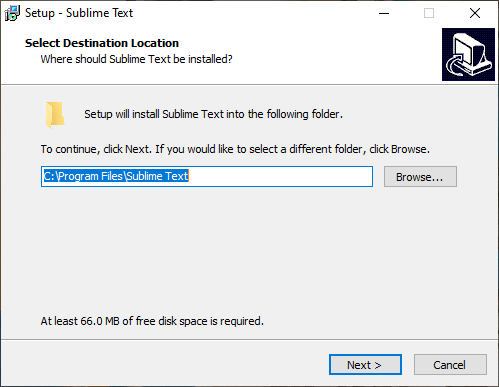
Choose the path to install Sublime Text 4 and click Next. You’ll be taken to the Additional Tasks window.
Select the Add to explorer context menu option to enable the “Open with Sublime Text” option to the context menu that appears when you right-click on any file of a relevant type.

Click Next. The wizard is now ready to install.
In the Ready to Install window, you’ll see the summary of the options you’ve selected. Click Install to Install the Sublime Text.
Sublime Text 4 will be installed and you’ll see the complete installation window.
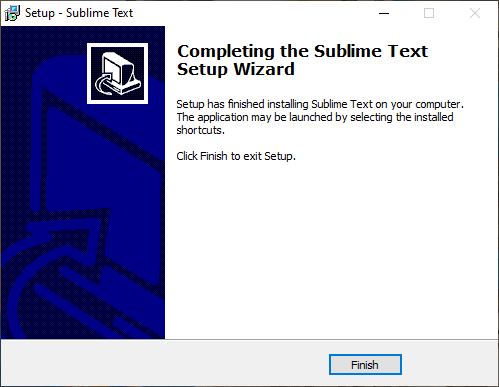
Click Finish to complete the installation of the Sublime Text. Sublime Text 4 will be installed.
Next, let’s configure the Sublime Text Editor for Python development with the appropriate package. But first, we need to install the component to let us install packages on Sublime Text 4.
As mentioned previously, Sublime Text functionality can be extended using plugins called packages. To install, update and manage them, you will need to install Package Control on Sublime Text.
You can install package control by using the menu Tools -> Install Package Control option from within Sublime Text.
Once the installation is done, you’ll see the message that the Package Control was successfully installed.
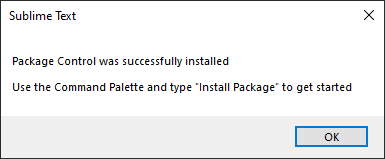
Now you can use the Command Palette to manage packages.
To install a package, Select Preferences -> Package Control menu.
You’ll see the package control option. Type install and you’ll see the option for install as shown below.
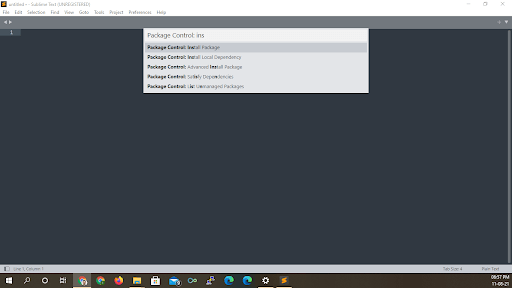
Select the Install-Package option.
Now we can install the packages we need to support Python on Sublime Text 4.
It’s worth noting that this is also how you can set up other packages to customize Sublime Text to your needs. Of course, we recommend you consider Tabnine for Sublime Text for your predictive code completion needs.
LSP (Language Server Protocol) can be used between source code editors such as Sublime Text and servers that provide programming language features. The protocol’s objective is to allow programming language support to be implemented and distributed independently of any given editor. This means using this protocol, any text editor can be configured for development in a specific language.
Sublime doesn’t natively support the LSPs. However, the community developed a plugin called LSP Project to call the different language servers and render the results in the editor.
For our purposes, we’ll be setting up the LSP-pyslp package, a convenience package for the Python language servers.
To install a package, open the package installer by selecting the menu Preferences -> Package Control and select the Install Package option.
In the install package window, type LSP-pylsp and you’ll see the package. Select that to install the LSP-lsp package.
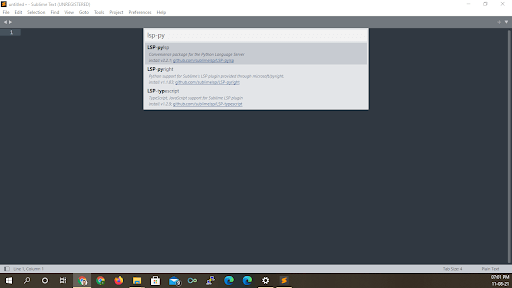
LSP-pylsp will be installed and you’ll see the LSP option as shown below.
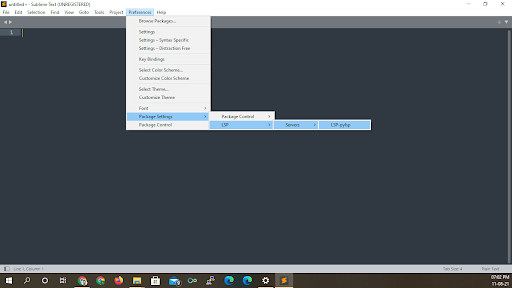
Select the LSP-pyslp option to set the preferences of the LSP-pyslp package.
This will open the LSP-pylsp.sublime-settings file.
On the right-hand side, you’ll see the default settings file. On the left-hand side, you’ll see the option with the text “Settings in here override those in “LSP-pylsp/LSP-pylsp.sublime-settings”. This means you can use this section to customize the LSP-pyslp package.
We’ll add a few LSP plugins to the customization section of the file to enable some helpful features for Python development on Sublime Text.
To add these, you’ll need to enter the following in the customization section of the file:
{
“pylsp.plugins.mypy-ls.enabled”: true,
“pylsp.plugins.flake8.enabled”: true,
“pylsp.configurationSources”: [“flake8”],
“pylsp.plugins.pyls_black.enabled”: true,
}
After adding the configuration, Click File -> Save to save the configuration of the LSP package and close the settings file.
Using Sublime Text for Python development is straightforward once you have the LSP package installed.
Launch the Sublime Text editor to open a new blank file. You can code a python program and save it as a sample.py file.
For example:
# Python3 program to swap first
# and last element of a list
# Swap function
def swapList(newList):
size = len(newList)
# Swapping
temp = newList[0]
newList[0] = newList[size – 1]
newList[size – 1] = temp
return newList
# Driver code
newList = [12, 35, 9, 56, 24]
print(swapList(newList))
Now, let’s see if the LSP packages are correctly installed.
Hover over the method name swapList, and you’ll see the definitions and references to this method, as shown below.
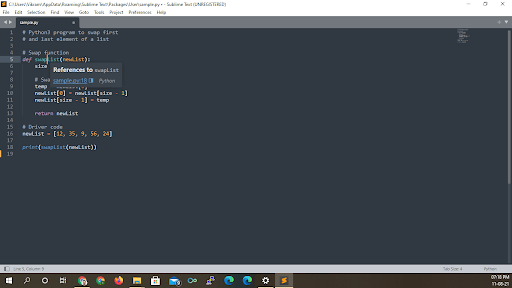
The message box shows that the swapList method is referred to in the file sample.py and line number 18. This result indicates that the LSP package for Python is functioning as expected.
You can run the python program by using the menu Tools -> Build option. If the default build system is not configured, you can select Python in the Tools -> Build system -> Python to make Python the default build system.
Though many professional Python developers default to paid IDEs like PyCharm, for beginner developers or programming polyglots, Sublime Text Editor offers a flexible and lightweight cross-platform editor.
Since 1976, the Emacs—short for Editor MACroS—family of text editors continues to evolve thanks to its vibrant developer community. Based on an extensible core engine that uses a dialect of the Lisp language, Emacs is one of the most customizable text editors in existence. What gives Emacs its longevity? It’s the cool packages that transform your Emacs experience into anything you can conceive of, enhancing your productivity in new and imaginative ways. Take a look at this rundown of the most interesting and productivity enhancing Emacs packages for 2021.
The Emacs text editor, which was designed for POSIX operating systems, is available on Linux, macOS, Windows, and other operating systems. Here are just a few reasons it still has a loyal following today:
Emacs really boils down to customization and productivity for your operating system.
This curated list focuses on the 17 best Emacs packages that enhance general productivity. It doesn’t include packages for specific programming languages.
Magit provides a complete, text-based Git integration solution directly into Emacs. By using Magit, you can perform Git activities such as committing code and performing diff operations. And you don’t have to ever leave the editor, which is an important feature for preserving context flow. Magit is faster and more intuitive than using a Git command line or graphical user interface for both Git novices and experts alike.
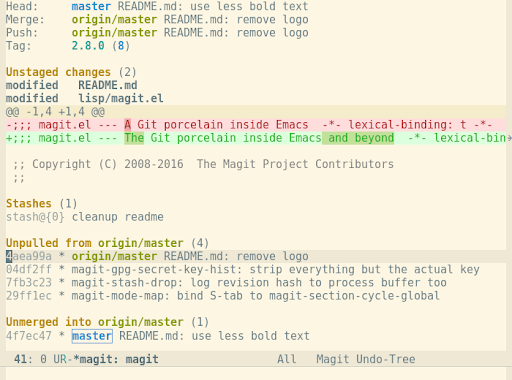
Figure 1. Magit screen showing the status buffer. Source: Magit.vc
Tabnine’s AI code suggestion package uses a machine learning model to analyze the ever-growing open-source community code base that’s available on public repositories such as GitHub. With this training model and massive data set, Tabnine’s AI quickly helps you produce clean code through intelligent code completion suggestions.
Tabnine evolves as you use it by studying your preferences and providing customized suggestions tailored to your needs. Beyond speeding up development with smart suggestions and producing clean, legible code, Tabnine’s AI uses a dual model system that separates your private code from the larger data set to ensure your code remains private and secure. Tabnine is a commercial product, but the basic AI model is freely available to anyone while the Pro version remains completely free for students.

Figure 2. Tabnine screen showing language autocompletion. Source: Tabnine
Evil gets its namesake from its purpose: extensible vi layer for Emacs. Many developers feel uncomfortable with Emacs’ default keyboard mapping. But, by using the Evil for Emacs package, you can introduce Vim-like visual selection and text objects directly into Emacs along with powerful and customizable keyboard mapping features. You can further extend Evil with bindings for Ediff, Magit, mu4e, and Lispyville.
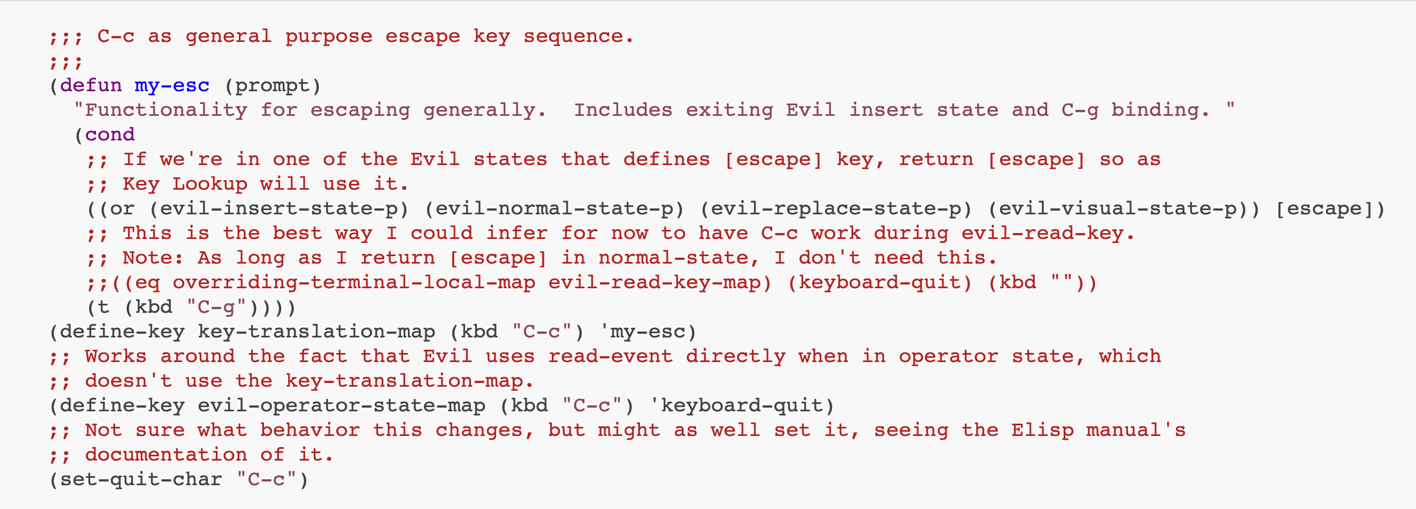
Figure 3. Evil example showing key translation. Source: Evil on Emacs Wiki
Projectile is a project interaction library package. It provides a set of features for operating on a project level without introducing external dependencies. With Projectile, you can easily jump to a project file, project buffer, or recently visited files. You can also switch between files using the same base name with a different extension (for example: .h or .cpp) and switch between projects. Plus, it offers many other tasks that you can perform on a project level. If you’re considering the Projectile package, also consider Project Explorer, a tree-view project explorer that integrates with Projectile.

Figure 4. Projectile running on a project. Source: Projectile.mx
Built on top of the Dired file browser, the sunrise-commander package integrates a powerful dual-pane file browser into Emacs. Sunrise-commander provides unique file management features. Some of these features include: path history, smart file comparison, directory comparison, multiple layout options, sticky searches, archive navigation, and terminal services.
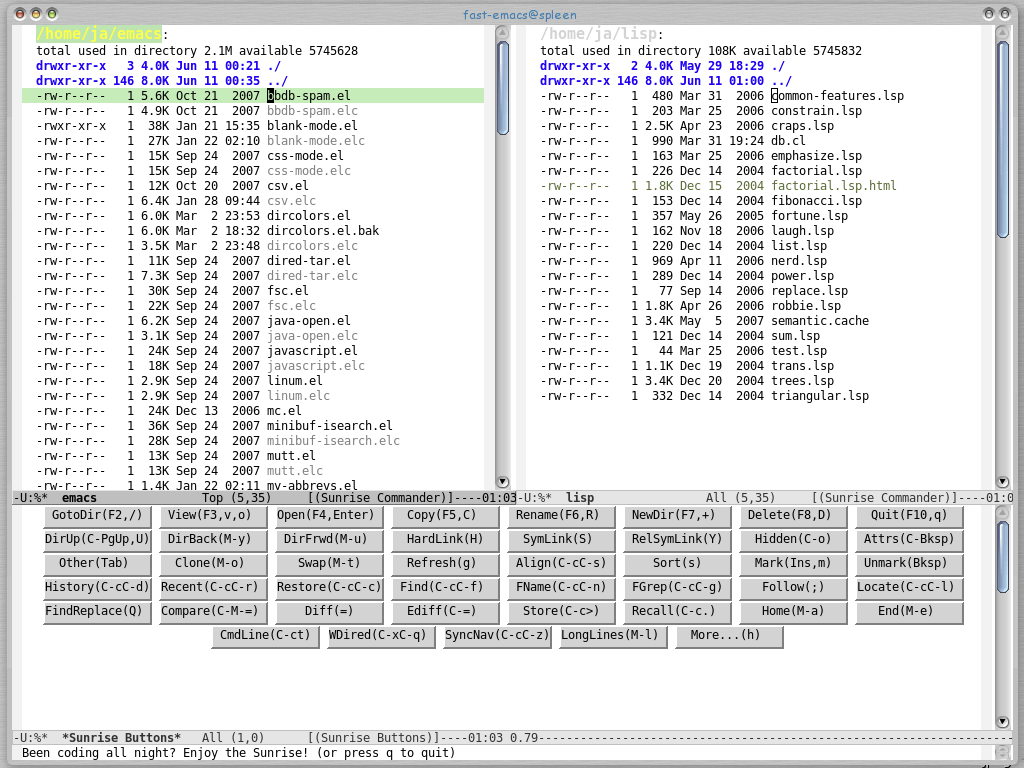
Figure 5. Sunrise Commander file. Source: Sunrise Commander on Emacs Wiki
When navigating a large code base, it’s easy to get lost and forget where to return to a previous section of code you were just working on. You can prevent this situation by using Goto-last-change. This package uses Emacs’ undo buffer to identify areas in the code that you recently modified. It helps you to navigate quickly to a previous position without undoing changes to the code.
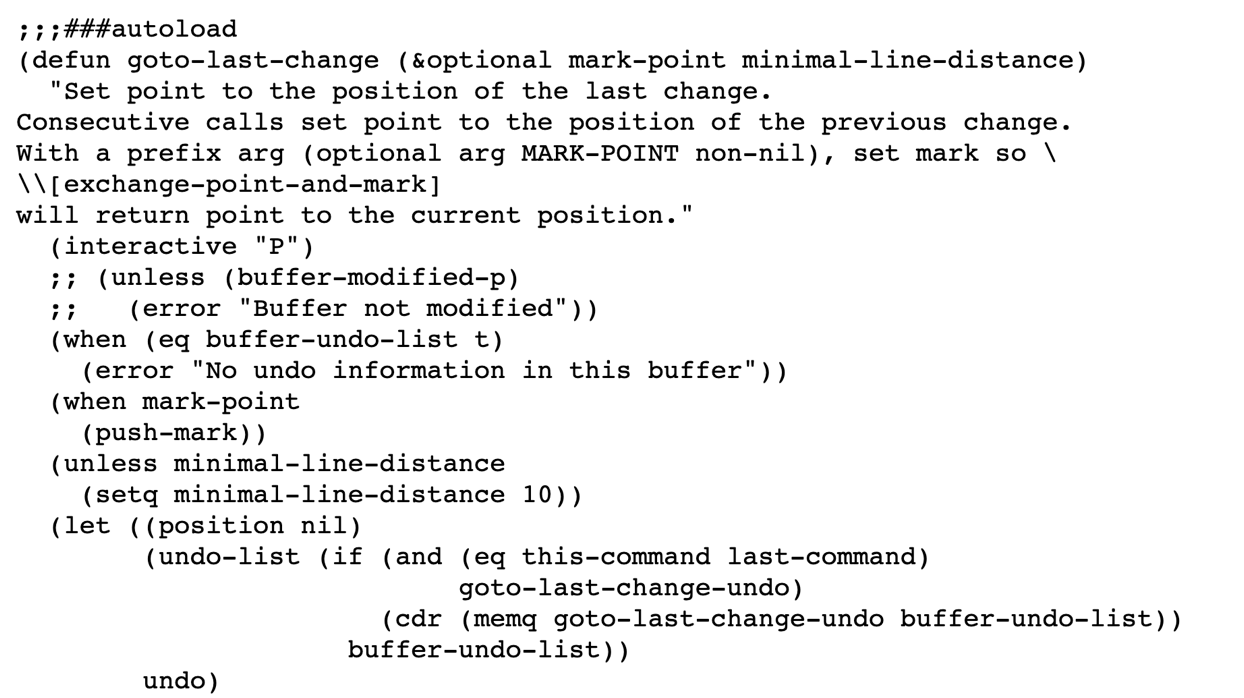
Figure 6. Sample of Goto-last-change. Source: Goto-last-change on Emacs Wiki
Minimap adds a sidebar overview of the code you’re working on in the main Emacs’ window. You can customize the layout, font, and sizes of the coding elements, such as the function names, to ensure legibility. You can also quickly navigate through the code area by scrolling the cursor up and down within the sidebar.
The Helm-swoop package shows lines that match a pattern in another buffer. By using helm-swoop, you quickly jump to and edit recurring elements within your code base without having to crawl slowly through multiple search results to find what you’re looking for.
Visual bookmarks helps code navigation by providing visible, buffer-local bookmarks. It also provides the ability to jump forward and backward to the next bookmark. This package is ideal if you’re missing a bookmark feature similar to Microsoft Visual Studio.
Rainbow-delimiters highlights delimiters such as parentheses, brackets, or braces based on their nested depth. Each delimiter’s level is highlighted in a distinct color, making it simple to identify matching delimiters, orient yourself in the code, and determine which elements are at any given depth.
Focus works by dimming text outside your current area of interest, so you can easily focus on your current coding activity. You can customize Focus to dim areas by sentence, paragraph, or code block.
Crux refers to collection of ridiculously useful extensions for Emacs. It enhances the editing experience by adding a multitude of utility commands that are just plain useful in everyday development. Here are some examples:
Undo Fu session replaces Emacs’ built-in undo functionality with a powerful undo system that’s capable of performing undo/redo operations across sessions. The enhanced functionality ensures that undo/redo operations continue functioning even after closing and re-opening files or even Emacs. It works by saving the session’s undo buffer in a separate file and loading it as soon as you resume editing.
YASnippet is a templating system for Emacs. You can use it to type an abbreviation and have it automatically expand into function templates. Using YASnippet saves time so you don’t have to repeatedly and manually write the same basic code structures. YASnippet supports C, C++, C#, Perl, Python, Ruby, SQL, LaTeX, HTML, CSS, and more.
Maintaining tidy code is important for legibility, especially if others are reviewing your code or if you go back to review code that you haven’t touched in a long time. Aggressive-indent-mode forces proper text indentation as you edit code and insert new lines. It’s an ideal package to ensure your code remains clear, without wasting time manually setting indentation on each line of code.
Flycheck provides an on-the-fly syntax checking package that uses external tools to validate your code’s syntax and highlight any issues it finds. Flycheck currently supports over 60 code and scripting languages including all the popular choices such as C, C++, Coffeescript, CSS, CUDA, Fortran, Go, Haskell, HTML, JavaScript, JSON, LLVM, Lua, Perl, PHP, Python, R, Ruby, Rust, SQL, TypeScript, and XML.
Apheleia is an Emacs package that automatically formats code to make it more legible every time you save the code base. Unlike many code-formatting tools, Apheleia works asynchronously to restructure your code without actually pausing your work as it’s processing. Code is reformatted in the background and applied only when Apheleia detects that formatting has changed. Apheleia uses smart logic to prevent a jump in your current cursor position, so you can continue working without interruption, even as your code is formatted in real time.
Even after over 40 years of continuous development, Emacs packages continue to surprise and innovate with cool new features that increase your productivity and workflow. From AI machine learning code predictions to smooth Git integration, Emacs demonstrates that it can continue to evolve in tandem with new technologies and developers’ shifting, modern-day requirements.