There are hundreds of plugins out-there for Android Studio and the number grows daily. This is mainly due to two reasons. The first is the fact that Android Studio is the industry accepted go-to IDE for creating Android apps. The second is Intellij IDEA, the platform upon which Android Studio is based, that allows for the development and easy installation of (mostly) useful plugins that are compatible with both IDEs. But which do you install, if at all?
Of course, you can go ahead and start coding on a clean installation of Android Studio, with just the necessary libraries installed and zero plugins added. But you’re smarter than that. You’re looking to install the Android Studio plugins to make your work more efficient, intelligent, and (when possible) fun. Worry not, as we’re here to direct you to the current top of the crop of Android Studio plugins that are bound to (at the very least) triple your productivity.
In our list of the top Android Studio plugins we included some must-have basic tools, as well as a number of little-known gems recommended by seasoned Android app devs in the Tabnine user community. So following our list of best IntelliJ plugins, here’s our favorite AS plugins:
Pretty much what the name suggests, this plugin can save you hours of tedious manual work. Among others, it offers style toggling (camelCase, kebab-lowercase, KEBAB-UPPERCASE, snake_case, SCREAMING_SNAKE_CASE, dot.case, words lowercase, Words Capitalized, PascalCase), Un/Escape, Encode/Decode, Increment/Decrement, natural order sorting, filtering and alignment.
A bit of a shameless plug(in). The Tabnine plugin uses machine learning to crowdsource code-completions from millions of Java programs, combined with your own unique context. Used by both beginner and senior Java developers, Tabnine makes development faster and helps eliminate those irritating errors that pop up in your code. In addition to the plugin, Tabnine also offers an extensive library of commonly used code snippets to copy and paste where you need it.
[cta_btn url=”https://www.tabnine.com/pricing/landing” label=”Start a free trial”]
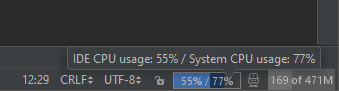
This simple UI plugin is more handy than one might initially think. As your code and app get more complex to compile and run, this will take a toll on your CPU. One of the most useful things about CPU Usage Indicator is the ability to generates a thread dump to show you what it is the IDE might be doing in the background to clog up the CPU.
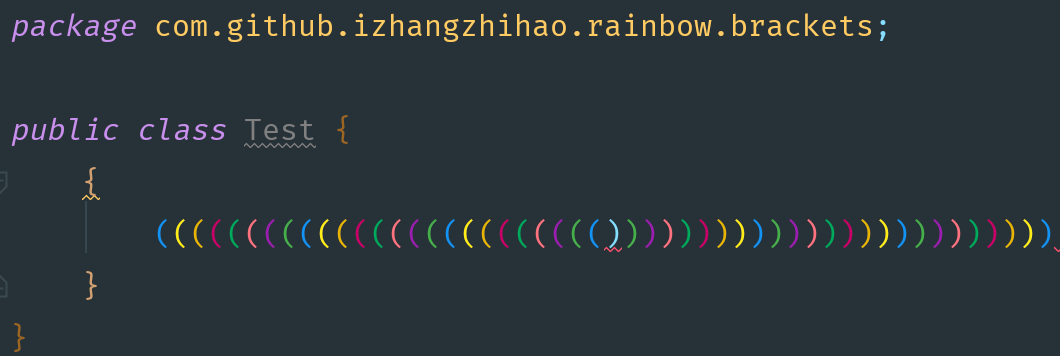
Nested brackets and parentheses have been a source of headaches for programmers as far back as this coder can remember (highschool). Many hours were lost looking for that missing bracket than is mucking up compilation. No more! Instead of sitting there for what seems like eternity trying to remember which number bracket you’re staring at? Add some color to your brackets and parentheses with the Rainbow Brackets plugin!
It supports Java, Scala, Clojure, Kotlin, Python, Haskell, Agda, Rust, JavaScript, TypeScript, Erlang, Go, Groovy, Ruby, Elixir, ObjectiveC, PHP, HTML, XML, SQL, Apex language, C#, Dart and others, most of which you really don’t need for Android development.
Complex Java code for Android applications can often contain a lot of boilerplate code (constructors, getters, setters, etc). This can lead to lengthy, difficult to read, and tedious to maintain methods. Project Lombok is a Java library that plugs into your IDE and generates those boilerplate code, keeping your code short and readable. The difference between pre and post Lombok code can be quite staggering.
It’s worth noting that being a compile-time only library, Lombok will not make your app any heavier. In addition, the Project Lombok website offers a lot on helpful resources for plugin users and developers.
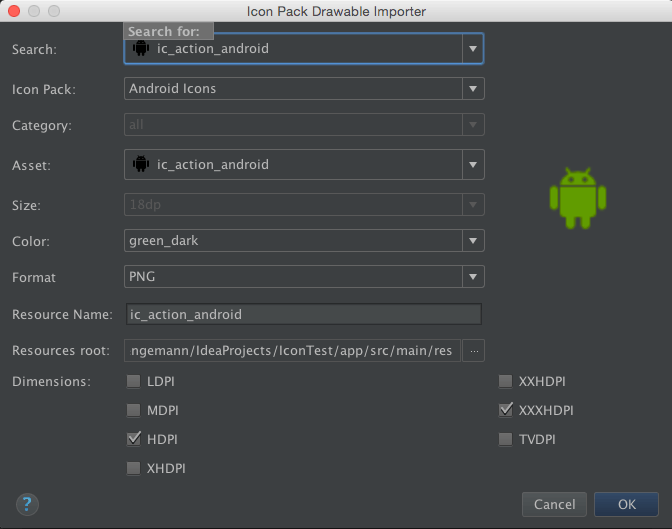
If you’re going to be working with drawable in your Android development, and there’s a very good chance you are, this is the first plugin you need to get to know. To adapt to all Android screen sizes and resolutions, every Android project contains a drawable folder.
If you’ve been blessed with a designer from heaven who provides the assets already in the correct folder with the correct naming, we’re jealous. Odds are, you’re not that blessed and have already found yourself manually renaming and moving the PNG files to the correct folders.
Unless you find this activity to have therapeutic value, Android Drawable Importer is the plugin that is going to save you a ton of time. It lets you import single assets to be adjusted for necessary sizes and resolutions, whole zip files to sort automatically to their folders, and batch-processing of multiple assets to integrate smoothly into the project.
To preview a vector drawable xml file you would normally need to build your app. To save you the trouble, Vector Drawable Thumbnails displays all Android vector drawables in the entire project with one click.
When you have a lot of drawable components in your project, remembering which is which can get hard. Wouldn’t it be nice if you had a quick preview of the image in your IDE? With Android Drawable Preview Plugin, you do.
This Android Studio plugin replaces the default icons with drawables previews inside the project view. Super-easy to access, but not an excuse to use ambiguous names for the drawable assets. Keep it descriptive, always.
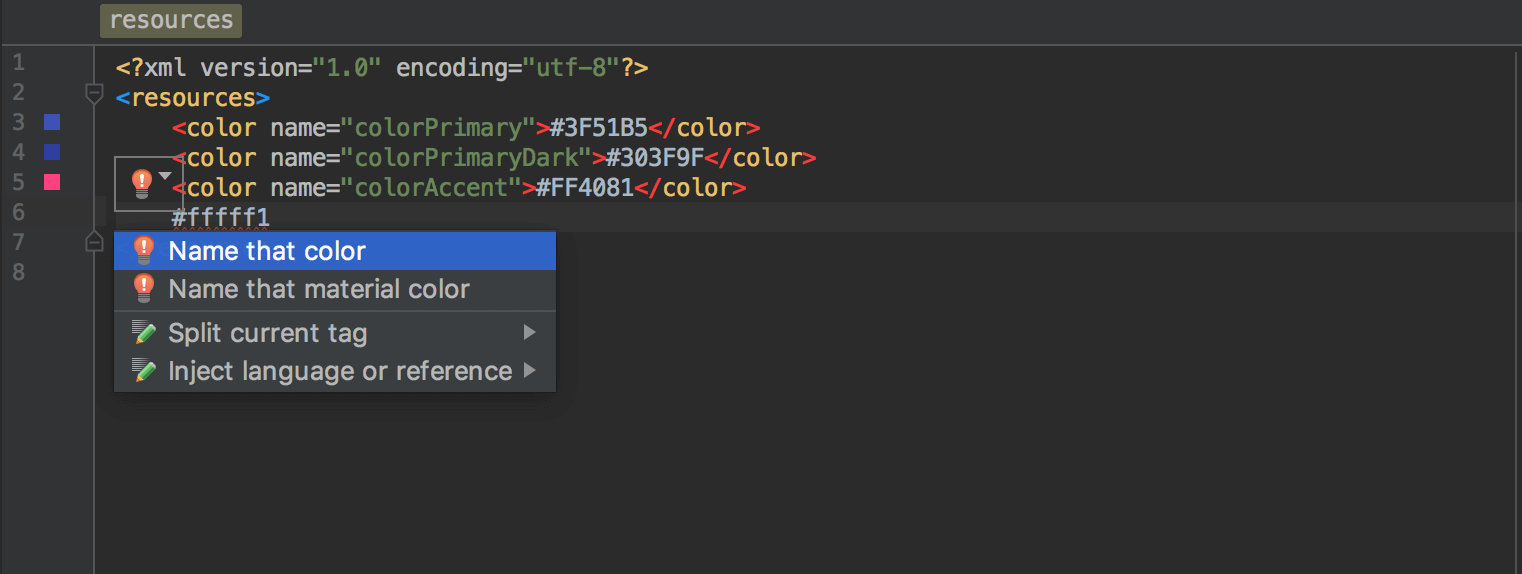
Let me start by busting a myth. Not all women can tell the difference between turquoise and teal, or eggplant and plum. The very much female writer of these lines is one such example. And I am not even color-blind.
The existence and popularity of this plugin indicate that most developers don’t have that magical color-recognition skill either, so I am in good company.
The Name That Color plugin will name the color you have in your clipboard directly inside your color resource file in Android Studio, and give the name of the closest matching color. No more “lighter_light_pink” in your xml.
bundletool is the underlying tool that Gradle, Android Studio, and Google Play use to build an Android App Bundle or convert an app bundle into the various APKs that are deployed to devices. This tool by Google is a must-have for more efficient APK packages.
Android ButterKnife is a “View Injection Library for Android”. It generally improves code readability, letting you to focus on the logic rather than glue code for finding views or adding listeners.
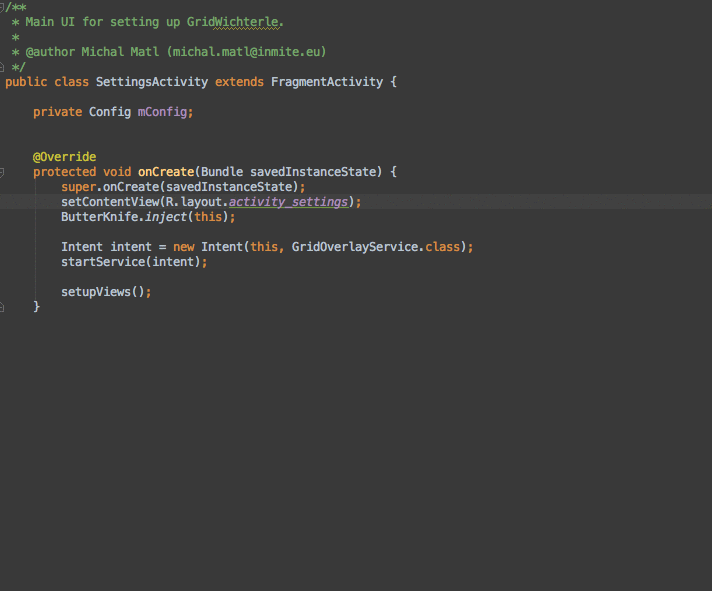
Developing with ButterKnife allows you to perform injection on arbitrary objects, which can get pretty complicated and tedious once you need to perform more than one or two. At this point, you need to refer to all layout XMLs to write them in the source file. Or you can simply install ButterKnife Zelezny.
Android ButterKnife Zelezny is an Android Studio Plugin for generating ButterKnife injections from selected layout XMLs in activities, fragments or adapters. In fact, most ButterKnife coding tutorials and guides you’ll find recommend you install Zelezny.
Android Input is a fairly simple but useful Android Studio plugin that allows to easily type text directly into your Android device or emulator. It remembers the last used device and last text entered.
This plugin for both Intellij IDEA and Android Studio adds a number of useful shortcuts to various ADB tool commands directly in your IDE. While this seems like a small addition, developers say ADB Idea can speed up development and debugging of Android apps.
Dubbing itself “a Swiss-army knife for Android testing and development”, adb-enhanced is a command-line interface to trigger various scenarios. It lets you play around with many potentially buggy app behaviors like screen rotation, battery saver mode, data saver mode, doze mode, and permission granting/revocation.
This plugin simplifies connecting the device to the ADB through WiFi for debugging. Like many other small but handy plugins, this one is simply a shortcut to a series of commands you can execute in the command line. But why not be comfortable?
Here be dragons is an Intellij/Android Studio plugin that lets you annotate your impure Java methods with the @SideEffect annotation and shows a little dragon icon in the gutter when you call them.
In addition to visually isolating impure functions, this plugin is just too cute not to include in our list. Because dragons.
You know your code is epic. On some particularly long hyper-caffeinated coding sessions, you can feel your fingers spitting fire and shaking the world. You are a development God, and as such, deserve to code like one.
You might want to disable the shaking effect unless it syncs with the shakes from all the coffee. We won’t judge.
Before you go ahead and batch-install all the plugins from the list, you should remember that more plugins usually means a slower IDE. Consider your coding habits and see what plugins will shave off time-consuming tasks without adding unnecessary extra weight to Android Studio.
Android development is one of the most popular fields of software development. Currently, 75.16% of all mobile users worldwide use an Android device. It’s also very likely that Google’s Android operating system will continue retaining its market position in the future as well.
Android offers endless opportunities for developers: it is a versatile, open platform used by millions of users worldwide with a powerful distribution platform to reach a large audience. There are plenty of Android developer tools to get you started and help streamline your workflow. The number of these tools is increasing all the time, while each one continues to become more efficient and intuitive.
Integrated development environments (IDEs) can contain a compiler, which translates the language you are coding into Android’s Java, and a debugging console, all usable through the same graphical interface.
This is where you’ll be doing most of the work—creating, designing, testing and polishing your mobile app.
The official IDE for Android development, created by Google. Android Studio provides code editing, debugging, and testing tools such as AVD Manager, Android Debug Bridge, and AVD Manager. It is free to download and is supported not only by Google but also by a large and actively engaged community of Android developers.
A Java IDE with built-in Android support, created by JetBrains. IntelliJ IDEA is a good choice for simple Android applications.
IntelliJ IDEA provides features like clever code completion, on-the-fly code analysis, refactoring tools, and useful JetBrains plugins. IntelliJ IDEA has both Community and Ultimate (commercial) Editions.

Not purely an IDE. Tabnine is an IDE plugin that provides AI based code suggestions inline as you write. Think of it as Grammarly for code. Tabnine’s free plugin is available for Android Studio, IntelliJ, Eclipse, and Webstorm and provide relevant code suggestions for Java, Javascript, and Kotlin.
Visual Studio 2019 is Microsoft’s official and free IDE for developers. It supports several different programming languages and when combined with Xamarin, it can be utilized to create native Windows, Android, and iOS applications.
Visual Studio with Xamarin is a good choice for developers looking to create cross-platform apps. One downside, however, is that it less convenient to access and use Java libraries and you lose some of Google’s support and advanced integrated features.
A game engine and IDE for cross-platform game development. Unity is easy to learn and comes with multiple game-specific features. With Unity 3D, you can create both two- and three-dimensional games. It has an all-in-one editor that features storytelling rather than coding, advanced performance profiling tools, a real-time rendering engine, and many other features. Unity 3D also allows you to build virtual reality applications.
The dev community tends to be quite open with a lot of their work, and chances are someone has made the library you need, but you can always pick and choose bits of code that are useful to you and put them into your own library.
Provides a flexible and customizable solution to upload images on Android. This library offers developers customizable features to cache and display images.
Provides a collection of many animation effects.
An image caching and networking library for Android. It is supported by Square and has an easy to use syntax, multiple online resources and support and features like image transformations, filters and more.
Simplifies communication between activities, fragments, threads, and services, with less code and better quality. Android application development requires communication between Android components, which sometimes becomes very difficult to manage. The EventBus library makes this task easy.
A view binding library that uses annotation to generate boilerplate code. It makes the code more clear and eliminates the need to write repetitive lines of code.
A mobile platform for developers from Google. Firebase includes a number of different features. These features revolve around cloud services, allowing users to save and retrieve data from any device or browser. Firebase can be useful for things like cloud messaging, hosting, crash reporting, notifications, analytics and even earning money through AdMob.
A mobile development tool that brings Google’s machine learning functionality to Android. That means adding things like computer vision and OCR without the need to have knowledge in deep learning and big data.
A collection of architectural patterns and tools for Android app development. It’s maintained by the Google Developers team.
Before developing a mobile app, it’s recommended to design the architecture of your application. Android Architecture Blueprints can help avoid typical architectural mistakes and inconsistencies.
A testing platform that allows checking memory leaks, bugs, and other issues on Android apps before publishing on Google Play. NimbleDroid helps to free up app developers’ time and speed up the overall QA process, helping to get the app to market faster.
A sophisticated debugging platform, developed by Facebook. Stetho offers an interactive debugging experience to Android developers. Stetho allows using Google Chrome’s developer tools to perform various debugging activities, such as view hierarchy inspection, network inspection, SQLite database management, and more.
LeakCanary is a memory leak detection tool based on MAT open source from Square. When a memory leak occurs, LeakCanary will automatically display the leak information, enabling developers to immediately repair the issue.
There are hundreds of other useful Android development tools available. Every Android developer has his own personal preference for what tools and environments to choose based on the particular application they are developing.
As the demand for Android applications continues to grow, the pool of platforms and solutions that help save developers time while helping to produce higher quality apps will continue to increase as well.
If you’re an Ubuntu user developing an Android app, or an open source enthusiast looking to tinker with the OS without bricking your device, the official Android Studio IDE (integrated development environment) from Google is a piece of software you need to install. This guide will walk you through the installation process of Android Studio on Ubuntu 16.04/17.10/18.04, and is suited for users of all levels.
Like with most actions and applications on any Linux machine, there are multiple ways to install Android Studio on Ubuntu. Included in this guide are the most straightforward couple:
To run Android Studio smoothly on your machine, you will need:
Before you install the Android Studio IDE, you need to make sure your Ubuntu installation is armed and ready with the recommended Java development kit for Android Studio – Oracle JDK.
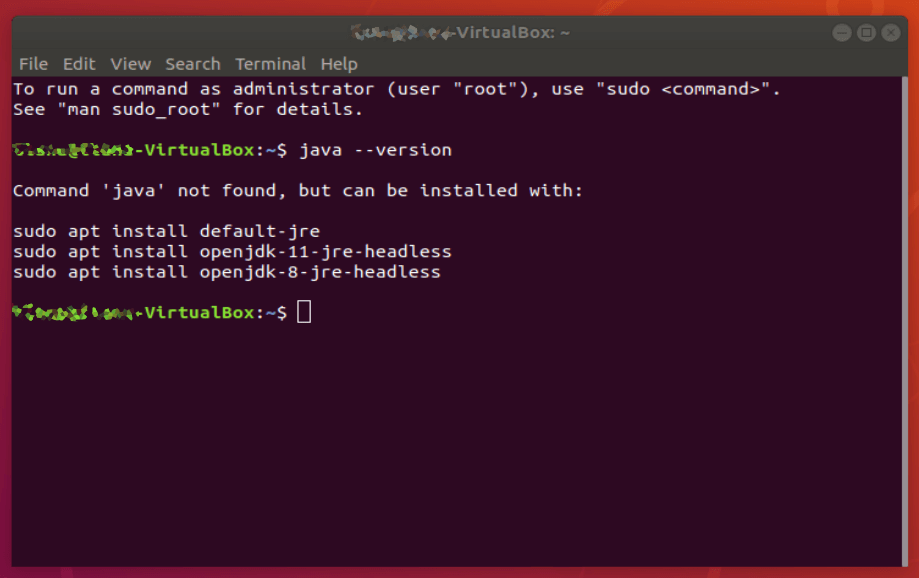
To check the version of Java currently running on your machine, use the terminal to run the following command:
java --version
If you don’t have Java installed, the output should be something like:
Command ‘java’ not found, but can be installed with:
sudo apt install default-jre
sudo apt install openjdk-11-jre-headless
sudo apt install openjdk-8-jre-headless
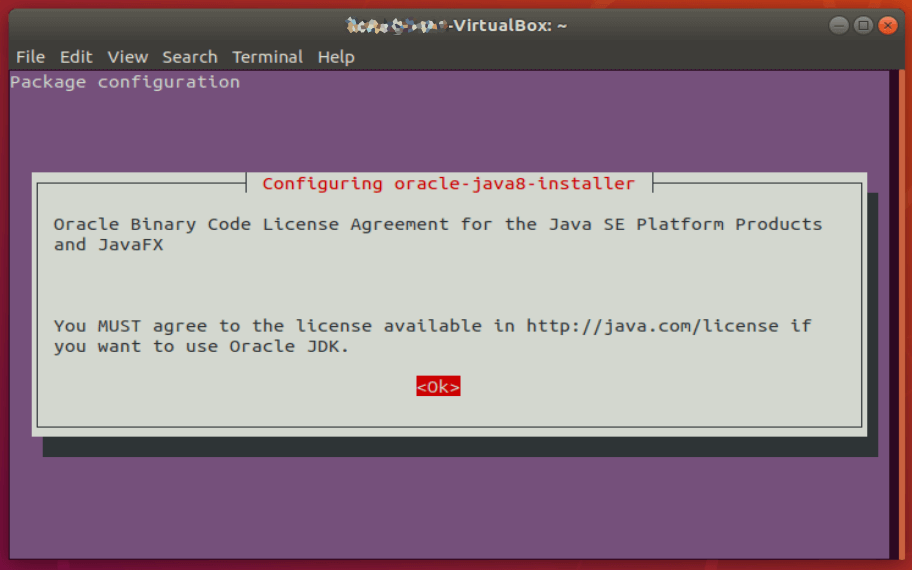
This is Ubuntu giving you hints on how to set up one of the default Java engines on your machine. Since Android Studio can be finicky about its Java, we’re going to ignore these options and install the Oracle JDK with the following commands:
sudo add-apt-repository ppa:webupd8team/java
sudo apt-get update
sudo apt-get install oracle-java8-installer
The download may take some time, so depending on your internet speed, this might be a good time to get some Java (or other caffeinated beverage) of your own. Once the download and installation are done, make sure to set the Oracle Java as the default:
sudo apt-get install oracle-java8-set-default
Next, verify the installation by typing:
javac --version
The result you should get is something like:
javac 1.8.0_201
Make sure to note the path of your Java installation. If you followed the instructions above, it will be /usr/lib/jvm/java-8-oracle/bin .
Finally, you will need to set the JAVA_HOME environment variable in Ubuntu to the location of your JDK installation. To do that, you will need to edit the .bashrc file. Switch to root by typing:
sudo su
To edit the bash file, enter:
gedit .bashrc

At the very end of the file, after the last fi, add the following lines:
JAVA_HOME=/usr/lib/jvm/java-8-oracle/bin
export JAVA_HOME
PATH=$PATH:$JAVA_HOME
export PATH
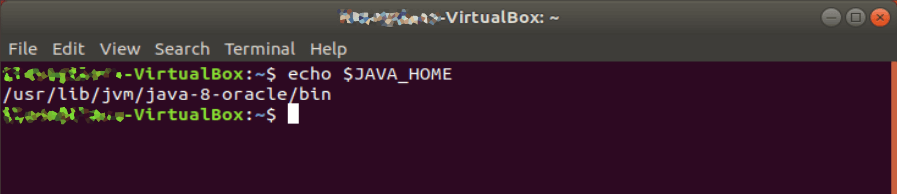
Save the bash file, restart the terminal, and type echo $JAVA_HOME to make sure the path is properly set.
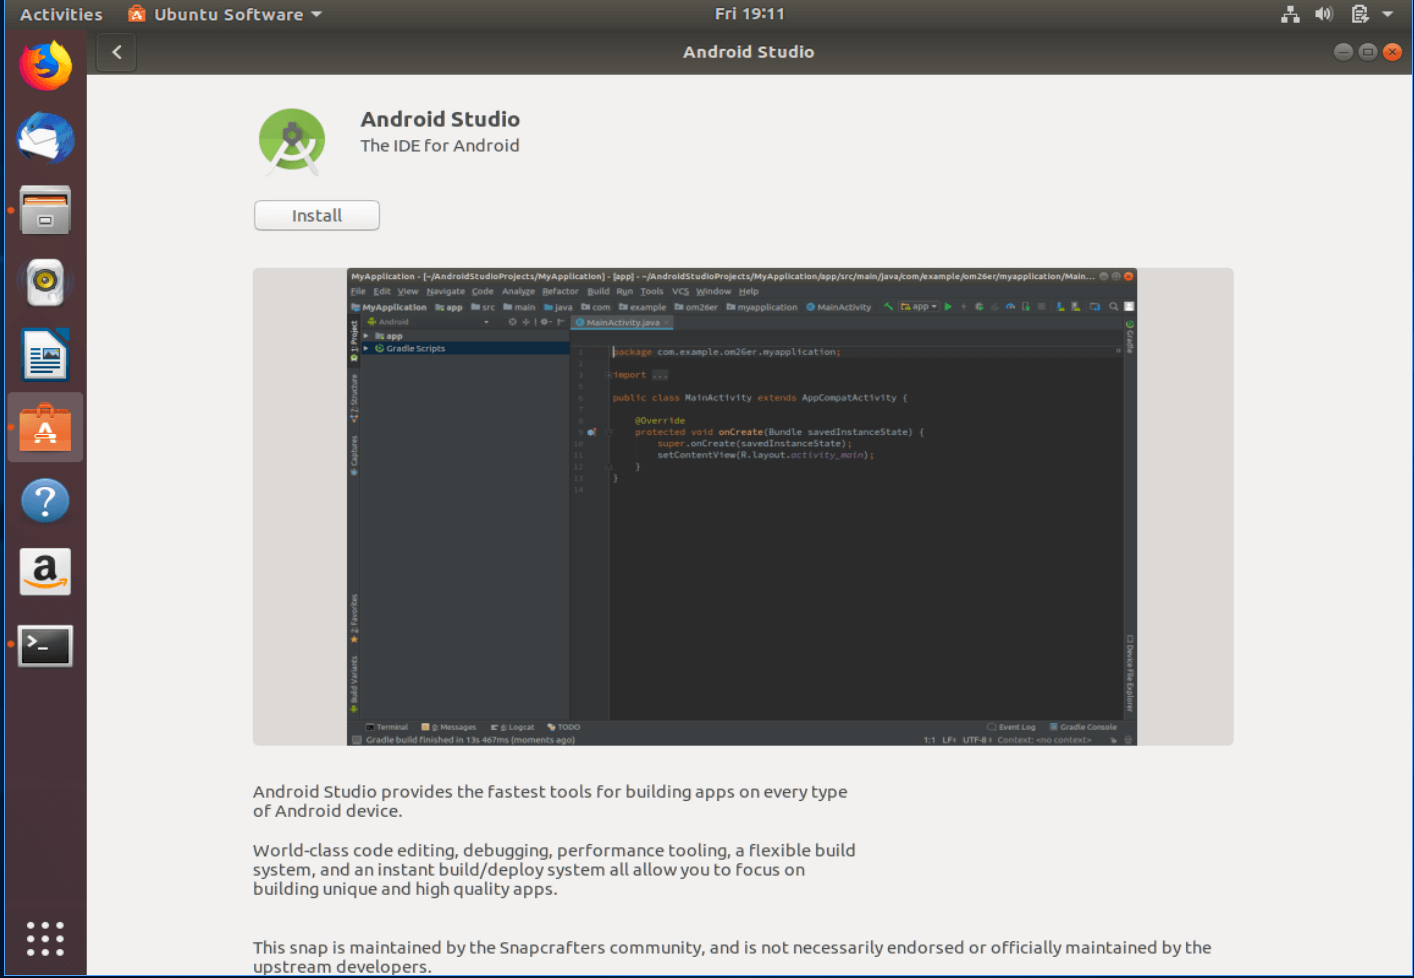
Linux is traditionally used in CLI (command line interface) mode (or terminal), but Ubuntu is working hard to make Linux accessible even to those of us raised on Windows and Mac and unused to typing commands. Part of that effort was including popular software packages and apps in the Ubuntu version of the app store – the Software Center – in the form of Snap packages. The installation process is really as easy as it gets.

Locate the Ubuntu Software Center icon in your taskbar and use the search functionality to find Android Studio. Click install and let it download and run initial setup.
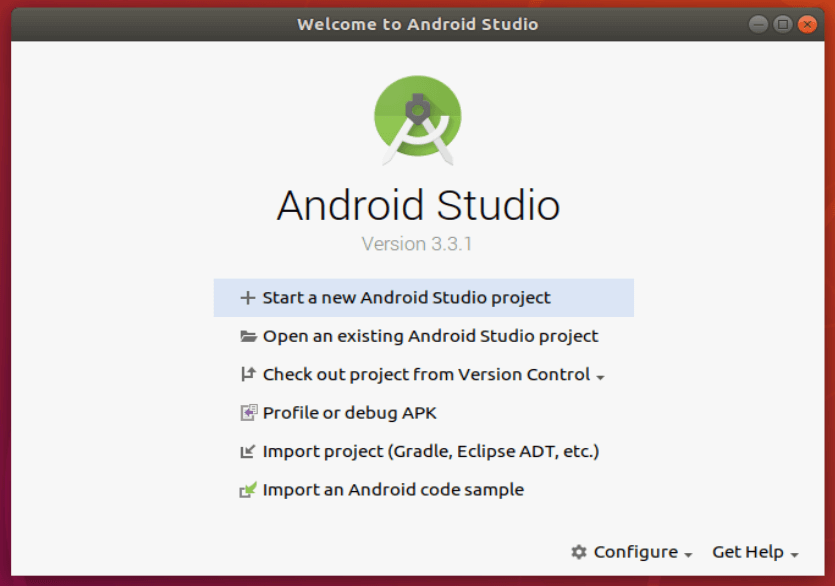
Once done, click Launch to run the Setup Wizard and proceed to download additional components and packages to complete the installation. Note that this too may take some time (depending on the speed of your connection and components you chose to install) so go ahead and grab another cup of coffee.
Upon completion, you will be able to start using Android Studio with a new or existing project.
If you prefer the official download over the community-maintained Snap, you can download and install Android Studio manually and according to the instructions released by Google.
Start by downloading the Linux package of Android Studio from the Google website. Yup, it’s time to get some coffee while the 1 GB file downloads.
Right click the zip file in the file browser and choose “Extract Here”. You can move the file out of the Downloads folder later, if you wish.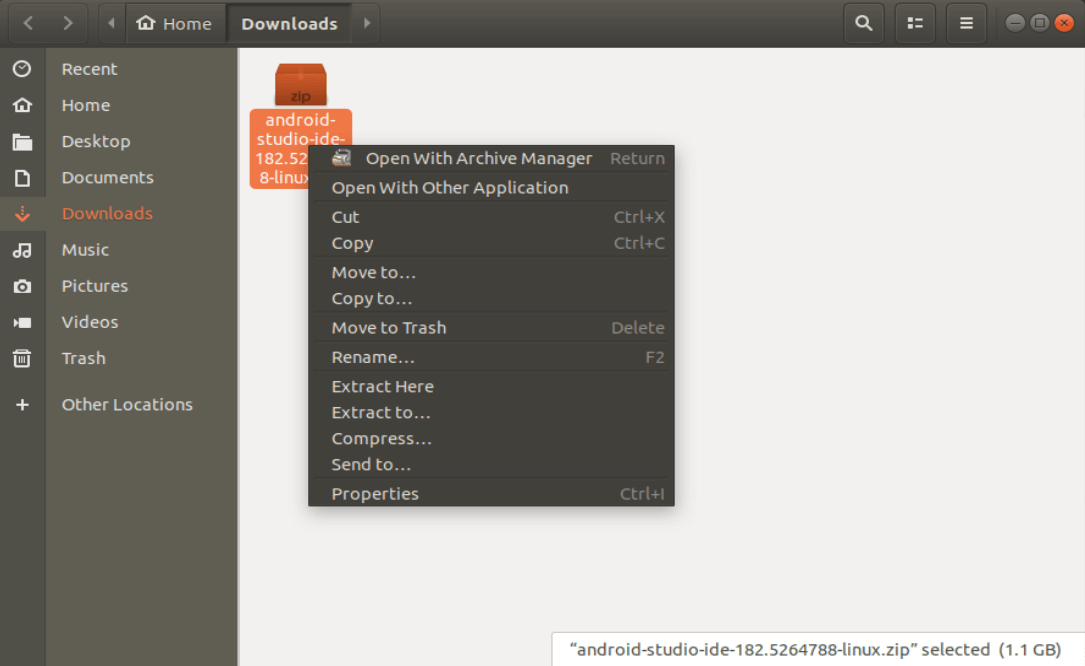
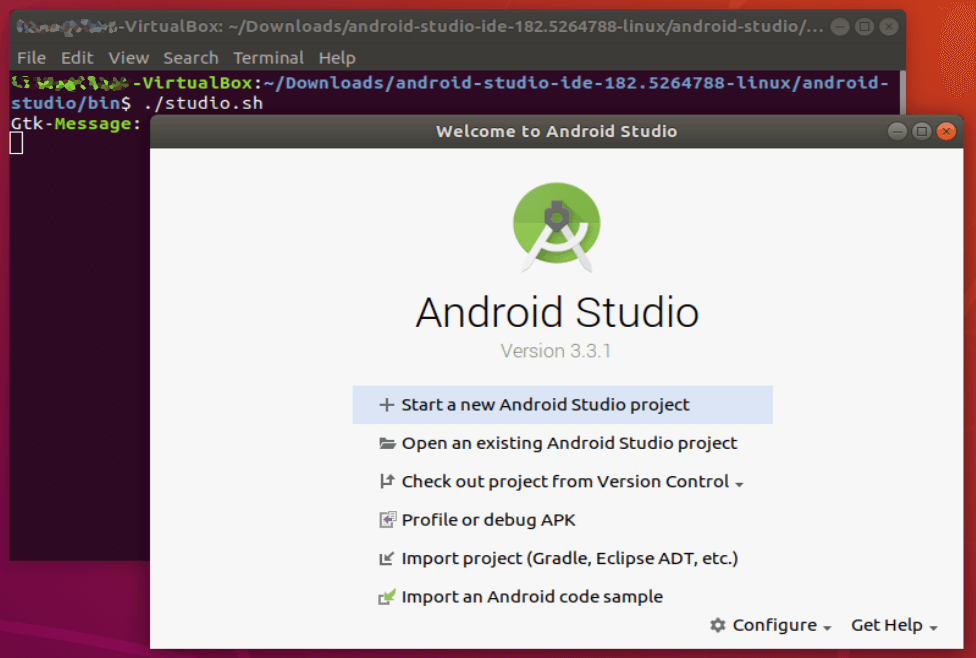
Navigate to the android-studio/bin/ directory, and open a terminal by right clicking and choosing “Open in Terminal”.
In the terminal, execute studio.sh by entering:
./studio.sh
If you have previous Android Studio settings you’d like to import, select them now. If not, proceed with new setting and click OK.
The Setup Wizard will launch, and proceed to download additional components and packages to complete the installation. Note that this too may take some time (depending on the speed of your connection and components you chose to install) so go ahead and grab another cup of coffee.
Once all the components you selected finish downloading, the app will launch and you can start working on your code.
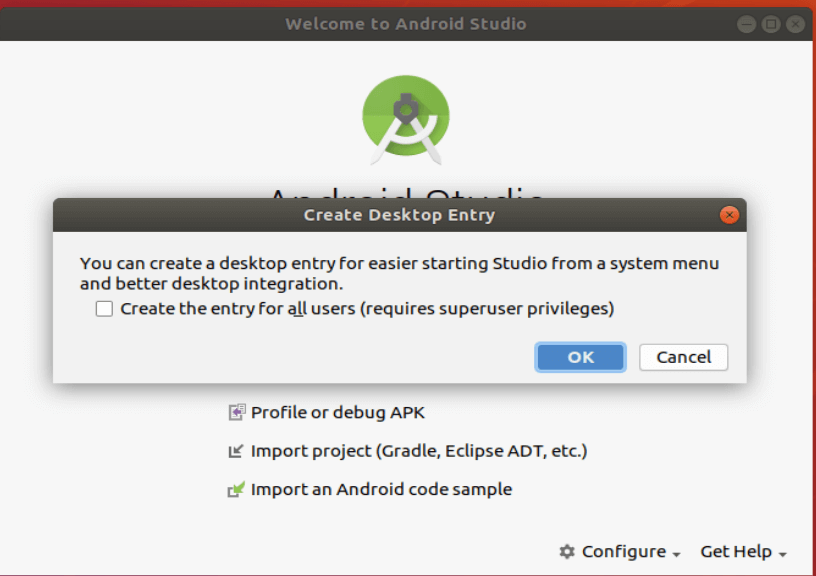
To make sure you can access the app quickly and without the terminal, choose “Configure” on the bottom right and “Create Desktop Entry”.
Caffeinated enough from the download and installation process? Good! Now get coding.