//
Subscribe to the Tabnine newsletter
//
Get news and updates about AI, software development, and more.

When Swift made its first appearance back in 2014, many developers went berserk thinking that what they’ve spent their time learning for iOS development just went down the drain.
Despite the initial confusion and general fear that what they know is now redundant? Swift is rather solid in its concepts and boldly takes the best bits of programming to make it their own. With 6 years of experience under its belt, Swift has grown into a mature language that’s well respected by the community.
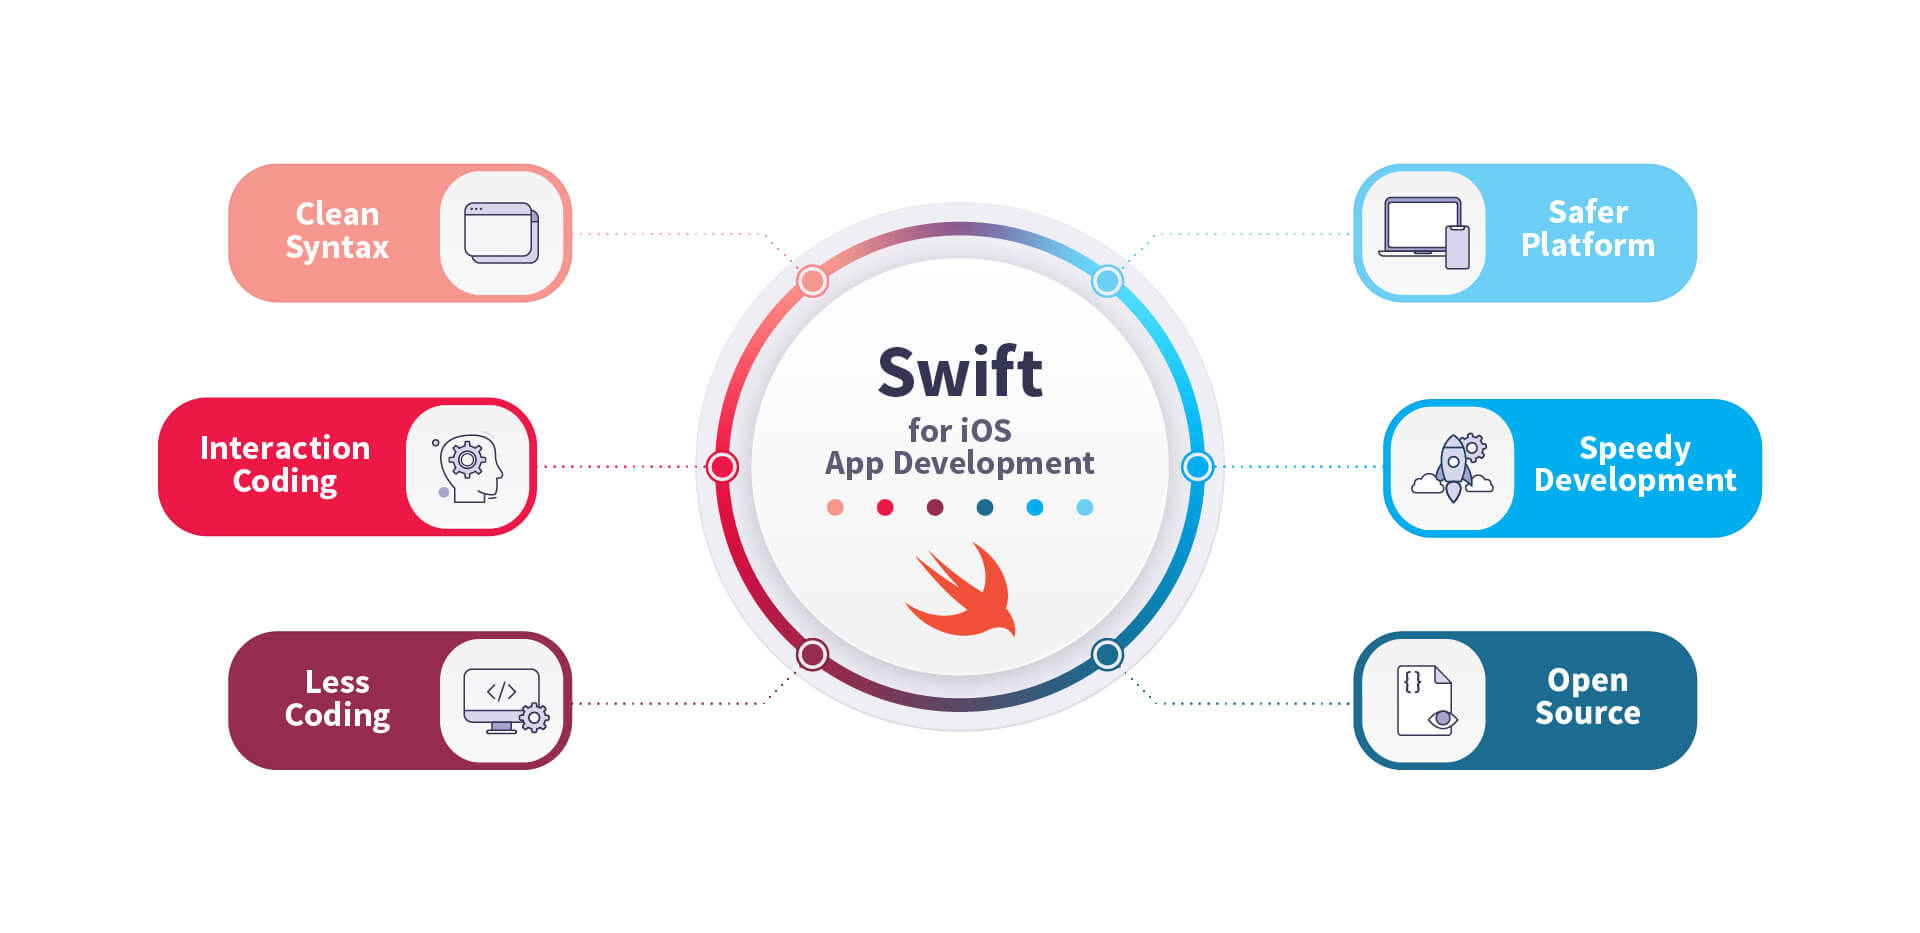
If you’ve already got some programming knowledge, learning Swift should be a breeze. In part, this is because it contains the same ideas that govern C-based languages, Rust, Haskell, Ruby, and Python, just to name a few. So if you already know one of these languages, then Swift should feel familiar to you.
However, if you’re new to coding and you’re learning Swift as your first programming language — don’t feel like you’re disadvantaged by this. Everyone starts somewhere and Swift is a good place.
Here is a quick on the basics of Swift to get you started.
At the foundation of all programming languages are the constants, variables, and data types. Swift is no exception to this. A variable in Swift looks like the standard variable declaration in any other programming language.
var name = "Just another variable"
Changing the assigned variable is a matter of reassignment.
 var name = "Just another variable"
 name = "this variable has changed"
If you use the let keyword instead of var, it becomes a constant and cannot be changed.
There are eight main basic data types and they are int, float, Double, Bool, String, Character, Optional, and Tuples. You can use type annotations to specifically set the type.
 var name: String
 name = "This is a string"
In Swift, there are the basic math operators that do exactly what we expect them to do such as addition +- , multiplication * and division /.
In addition to this, there are also comparison operators that let you compare two or more variables based on their assigned values such as greater than >, greater than or equal >=, and less than <.
The resulting value returned will always be a Boolean because the answer can only be true or false.
To check equality, == rather than a single = is used. A single = tells Swift to assign a value, while a == tells the program that it is comparing two values to determine the truthiness of the statement. You can also use != to check if something is not equal to each other.
In Swift, a function is defined by using the func keyword. Each function has the ability to take in parameters, followed by -> and the expected returned type.
So the skeleton of a function in Swift looks something like this:
 func functionNameHere(ParametersHere) -> returntype {
  //some code here
 }
If we translate this into a real function, it can look something like this:
funct course(name: String) -> String {
return name
}
print(course(name: "Learning Swift 101"))
And that’s the basics of writing functions in Swift.
A loop is a set of statements that repeats until a certain condition is met. Like other programming languages, Swift supports the following:
A for-in loop iterates over a collection of times such as range of numbers or items in an array. The condition is the length of the item, tracked by the index. In Swift syntax, a for-in loop looks something like this:
 for index in variableName {
    statements here
 }
If we translate this to an example, it would look something like this:
var someStrings:[String] = ["Hello", "my name is", "a loop"]
for index in someStrings {
print ( index )
}
In contrast to a for-in loop, a while loop in Swift repeatedly executes a target statement as long as the condition is true.
 while condition {
    statements here
 }
When transposing this into actual code, it can look something like this:
var lifeCounter = 10
while lifeCounter > 0 {
print( "You have (lifeCounter) lives left")
lifeCounter = lifeCounter - 1
}
A repeat…while loop is similar to a while loop. However, the check happens at the end at the executed statements.
 repeat {
    statement(s)
 }
 while( condition )
So in code, it can look something like this:
var lifeCounter = 10
repeat {
print( "You have (lifeCounter) lives left")
index = lifeCounter - 1
}
while lifeCounter > 0
Enumerations in Swift are similar to C and Objective C enumerations. An enumeration is a set of user-defined data types with an attached set of related values. Here is the syntax for enumeration in Swift:
 enum enumname {
    // enumeration values here
 }
When we put this into code, it looks something like this:
enum DaysOfTheWeek{
case Monday
case Tuesday
}
var days = DaysOfTheWeek.Monday
days = .Monday
switch days {
case .Monday:
print("Hello, Monday")
case .Tuesday:
print("Hello, Tuesday")
default:
print("just hello")
}
What’s happening here is that DaysOfTheWeek is defining the enumeration name. Each of the members inside DaysOfTheWeek can be assigned to a variable. In our case, Monday is assigned to the days variable. The switch case allows us to branch into the different outcomes and the corresponding member is matched against the case.
This is just an introduction to the syntax of Swift. There are more to explore in the official iOS development language. Apart from translating the syntax of what you already know over, there are a number of other things such as structures, options, collections, protocols, closures, extensions, and interface builders.
At the base of Swift is the syntax. Once you have that figured out, the next step would be to unravel the visual layer of Swift development. This includes digging into the auto layout and stacking views for building precise user interfaces.
Segues and navigation controllers are also important as it is the thing that lets us define relationships between view controllers and navigation. A good branch off from this would be to dig into tab bar controllers and how the view controller life cycle works.
The next step is to figure out how to create HTTP and URL sessions, in addition to JSON consumption and dealing with concurrency. These topics are extensively addressed by the official Apple iOS development guides available on Apple’s official Books app.

Or if you’re a more interactive learner, Apple also has a Swift Playgrounds app that can teach you an end-to-end approach to iOS development through a gamified approach. The app is primarily aimed at non-coders picking up coding for the first time, but can also be a valuable resource for developers who are looking to not get stuck in tutorial hell. It mostly consists of different modules that can build on different parts and features that are available for iOS devices such as camera accessibility, augmented reality, and the various sensors available.
Explore recent posts
//Explore recent posts
//
2 -min read

2 -min read

4 -min read
More How-to's
//4 -min read
11 -min read
7 -min read